Showing posts with label cheese. Show all posts

Sunday, August 4, 2013

Ⓥ Vegan Kitchen: Stuffed Zucchini Ⓥ


It's Zucchini season and this year our garden is brimming with them for the first time. We actually can't keep up! So, obviously, it's time for some fun zucchini recipes. ;)
This recipe is super easy to make and delicious. It takes a little time but takes very little effort. Perfect! :) 
This makes a perfect summer meal, or a great side dish! 

Stuffed Zucchini

1 large Zucchini (or a few smaller ones)

1 cup Red Lentils
2 cups Water
1 tbsp Miso (veggie stock works too)
2 Garlic cloves, minced
2 Tbsp Nurtitional Yeast
1/2 tsp ground Oregano 
1/2 tsp Black Pepper
1/2 tsp Salt

Daiya cheese (optional/ or other vegan cheese)


Preheat oven to 350° F.
Cut the Zucchini lengthwise. Using a teaspoon, scoop out the centres (seeds and soft centre)--save the scooped out portion. Place the zucchini halves into a large shallow baking dish. 
In a medium saucepan, cook the red lentils in water for about 20 minutes. Chop the scooped out zucchini and add it to the pot along with the miso and spices; cook another 5-10 minutes until the lentils are fully cooked through. 
Spoon the lentil mixture into the hollowed out centres of the zucchini halves. Top with daiya cheese (optional). 
Bake in the oven for 30-45 minutes (cooking time will depend on the size of your zucchini--so check it at about the 30 minute mark by poking it with a fork--it should still be firm but not so firm that it's still hard). 
Serve and enjoy! Makes 4 servings. 


Photobucket

If you found this article to be helpful, please consider a small donation or visit the shop. Thank you for your love and support.

Sunday, March 24, 2013

Ⓥ Vegan Kitchen: Easy "Cheesy" Potatoes! Ⓥ


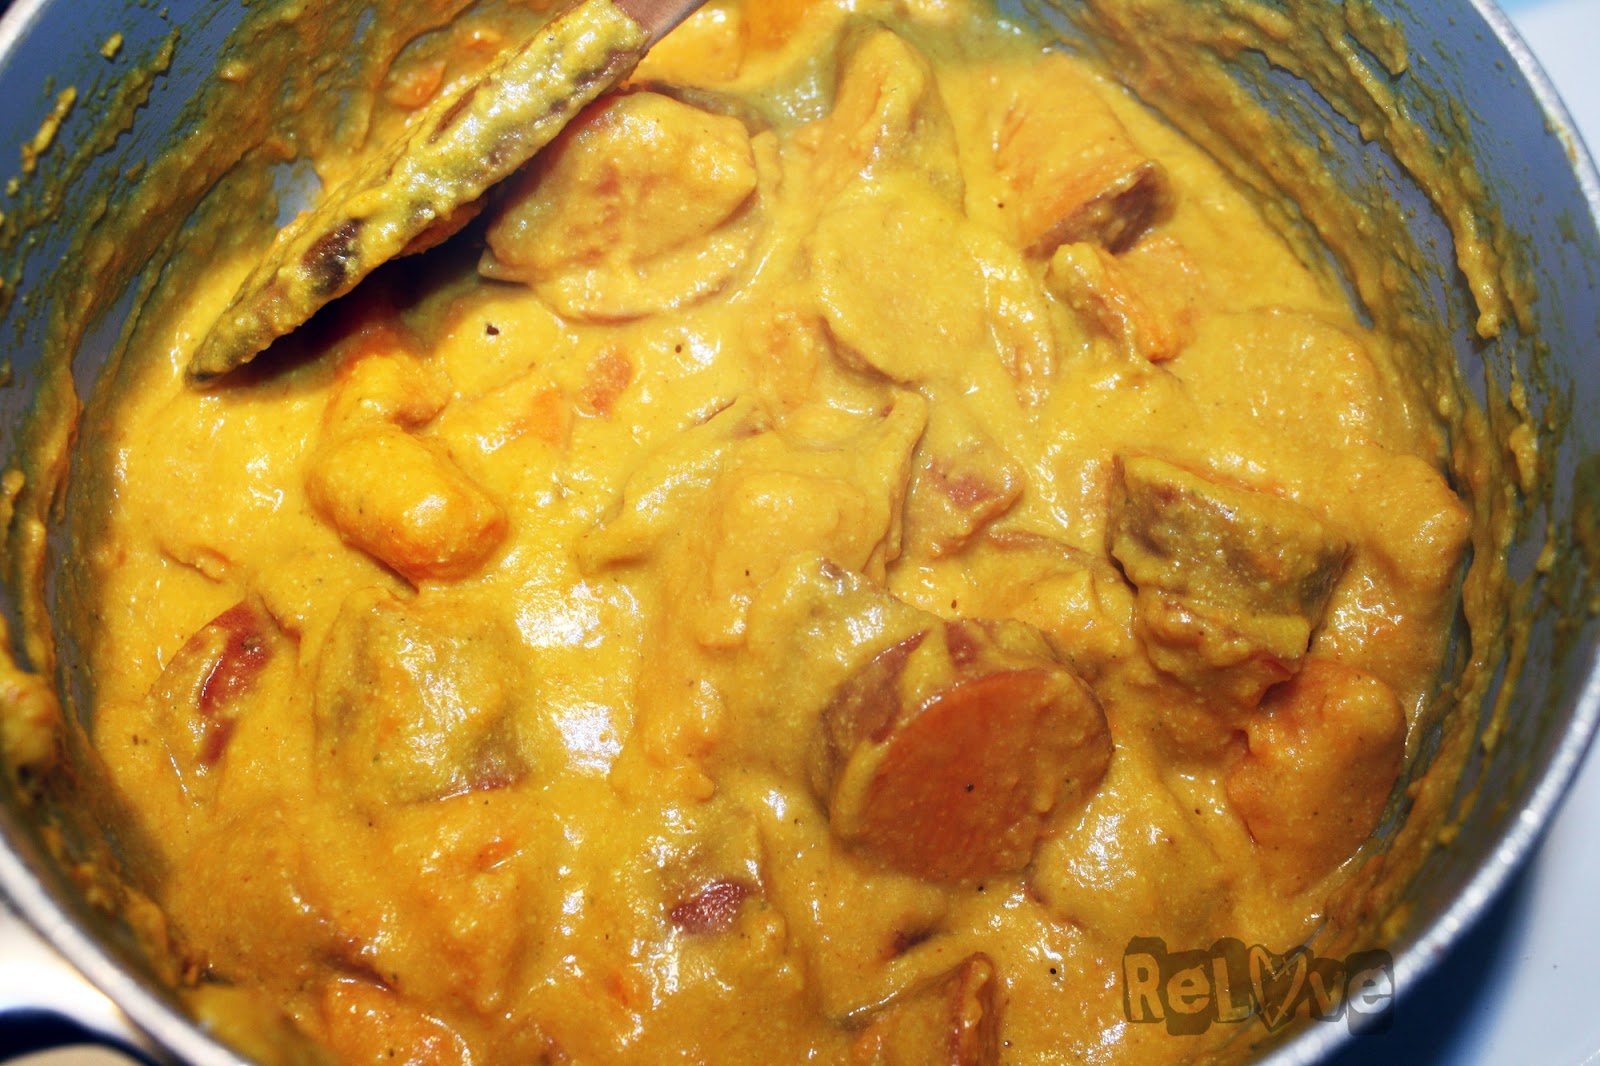
This is a delicious, creamy, easy and quick recipe to whip up. It's the perfect comfort food and/or side dish to any meal and will leave any cheesy cravings satisfied. 
This recipe is gluten free, dairy free (and vegan of course), free of nuts, and free of soy--for those with lots of allergies like myself. ;)  

Easy "Cheesy" Potatoes

1 Large Sweet Potato (or regular potatoes)
1 Tbsp Earth Balance, or vegan margarine
1 Tbsp Rice flour (or other flour)
1/4 cup vegetable broth
4 Tbsp Nutritional Yeast
1 Tbsp Lemon Juice
3/4 tsp Salt
1 tsp Mustard, ground
1/2 tsp Garlic salt
1/2 tsp Turmeric 
about 1/2 cup "Milk" (I like to use coconut because it's a little creamier)


Chop up your potatoes and in a medium pot, boil them until almost cooked. Don't overcook them though, you want to be able to be firm but able to poke them with a fork but for them not to be mushy.  
Drain the water. 
In the same pot, add the earth balance, stock, and spices and stir for a moment. Add the flour, nutritional yeast, and lemon juice, and then gradually add the milk, stirring constantly. The flour will thicken up the sauce so you can add more or less milk depending on how creamy you want it to be. Cook for a few minutes until your sauce has thickened up. 
Serve and enjoy! Super easy cheesy potatoes! 
Makes 2 servings. If you want larger portions just double up the recipe. 


This recipe has been shared at: Fat Tuesday
Photobucket


If you found this article to be helpful, please consider a small donation or visit the shop. Thank you for your love and support.
Sunday, January 20, 2013

Ⓥ Vegan Kitchen: "Cheezy" Kale Chips! Ⓥ


This is my second kale chip recipe I'm posting, and I know I went off about how amazing the last recipe was, but for real, this recipe is the best damn thing ever created!! ;) 
We make a batch every couple weeks and eat most of them entirely too quickly. Well, at least they're super healthy! 
These are packed full of flavour with a rich "cheesy" flavour. The trick with these is to dehydrate or cook them just the right amount, so be sure to keep an eye on them. You want them to be perfectly crispy but not too dry, but you don't want them to be soggy either. Practice means perfection! ;)

We make these in our kick-ass Excalibur dehydrator, but I've included general baking instructions to bake these in the oven as well--I just haven't personally made them in the oven, so keep an eye on them and let me know how they turn out. ;)  


"Cheezy" Kale Chips

*2 large bunches of Kale, chopped up (larger stems removed)
1 cup raw Cashews, soaked for at least 10 minutes. 
4 Tbsp Nutritional Yeast
2 Tbsp Lemon Juice
2 Tbsp Hemp Oil (or other healthy oil)
1 tsp Salt
1/2 tsp Black Pepper
a little water for consistency

Recipe Variation:
If you have a cashew sensitivity then replace the 1 cup of cashews for about 3/4 cup of sunflower seeds. Soak them for about 10 minutes and follow the rest of the recipe as usual. 

*we don't really measure the kale, we generally buy two bunches from the farmer's market or co-op grocery store and chop it up so that it fills a large bowl as pictured. ;) 

Chop up your kale into larger "chip"-sized pieces--don't go too small as they will shrink up a lot--and remove the larger stems. 
In a food processor, blend up all your ingredients, adding a little water until you get a nice creamy consistency. 
Toss your kale into a large mixing bowl and pour your mixture over, thoroughly mixing so that all the kale is evenly coated. 


In the dehydrator:
Line up your kale in your dehydrator trays and dehydrate for approximately 6-8 hours. Like I said, keep an eye on them, the time will vary by how much coating is on your kale and what kind of kale you used. 
Why I love the dehydrator method? Because you're keeping them raw (depending on your ingredients) and therefor packed full of all their beneficial nutrients. :)


In the Oven:
Spread the kale evenly on a large cooking sheet. Now, there are two ways of doing them in the oven…
One, is the attempt to keep more of the nutrients by cooking at a lower temperature: Preheat oven to 200° F and bake for 2-3 hours. 
Two, is if you're impatient but you'll kill a large portion of the nutrient value: Preheat oven to 350° F and bake for approximately 10 to 15 minutes.
Either way, cook until the kale chips are crispy and the edges are lightly browned--not burnt! 


Enjoy! ;) 

Photobucket Save $100 on Blendtec Factory Recertified Blenders + Free Shipping

If you found this article to be helpful, please consider a small donation or visit the shop. Thank you for your love and support.

Sunday, July 22, 2012

Ⓥ Garlic Scape Pesto Ⓥ


Having a garden is all sorts of fun! One reason? Garlic scapes! You can get them at grocery stores too I imagine, I've just never noticed them. Anyway, we found out that we could make pesto out of them so I looked online for recipes and modified, combined, and made my own. 
It's perfect for pastas, quesadillas, pizza, sandwiches, even for dipping, or whatever else your imagination can come up with. 

Garlic Scape Pesto!

(Parmesan Cheese part)
1 cup Sesame Seeds
2 Tbsp Nutritional Yeast
2 Tbsp Lemon Juice
1 Tbsp Water
1/2 tsp Salt
Process all the sesame seeds, nutritional yeast, and salt in a food processor. Add the lemon juice and water once the sesame seeds start to mush together and continue to process until you get a smooth sort of "paste" consistency, or until smooth--this takes a while so be patient. ;)
Set aside in a bowl. 


(complete pesto!)
3 Garlic Scapes
"Parmesan Cheese" (above)
2 Tbsp Lemon Juice
1/4 cup Olive Oil
2 handfuls of Spinach
Process the garlic scapes, spinach, and lemon juice until fine--you don't need to clean out your food processor from making the "parmesan cheese", silly. ;) Add the "cheese" mixture a few portions at a time, alternating with the olive oil. Process until smooth or desired consistency is reached. You may want to add more salt if desired as well. 
Make approximately 1.5-2 cups. 


Again, goes great with so many different recipes so play around with it! Enjoy! :)


Photobucket

If you found this article to be helpful, please consider a small donation or visit the shop. Thank you for your love and support.

Sunday, April 8, 2012

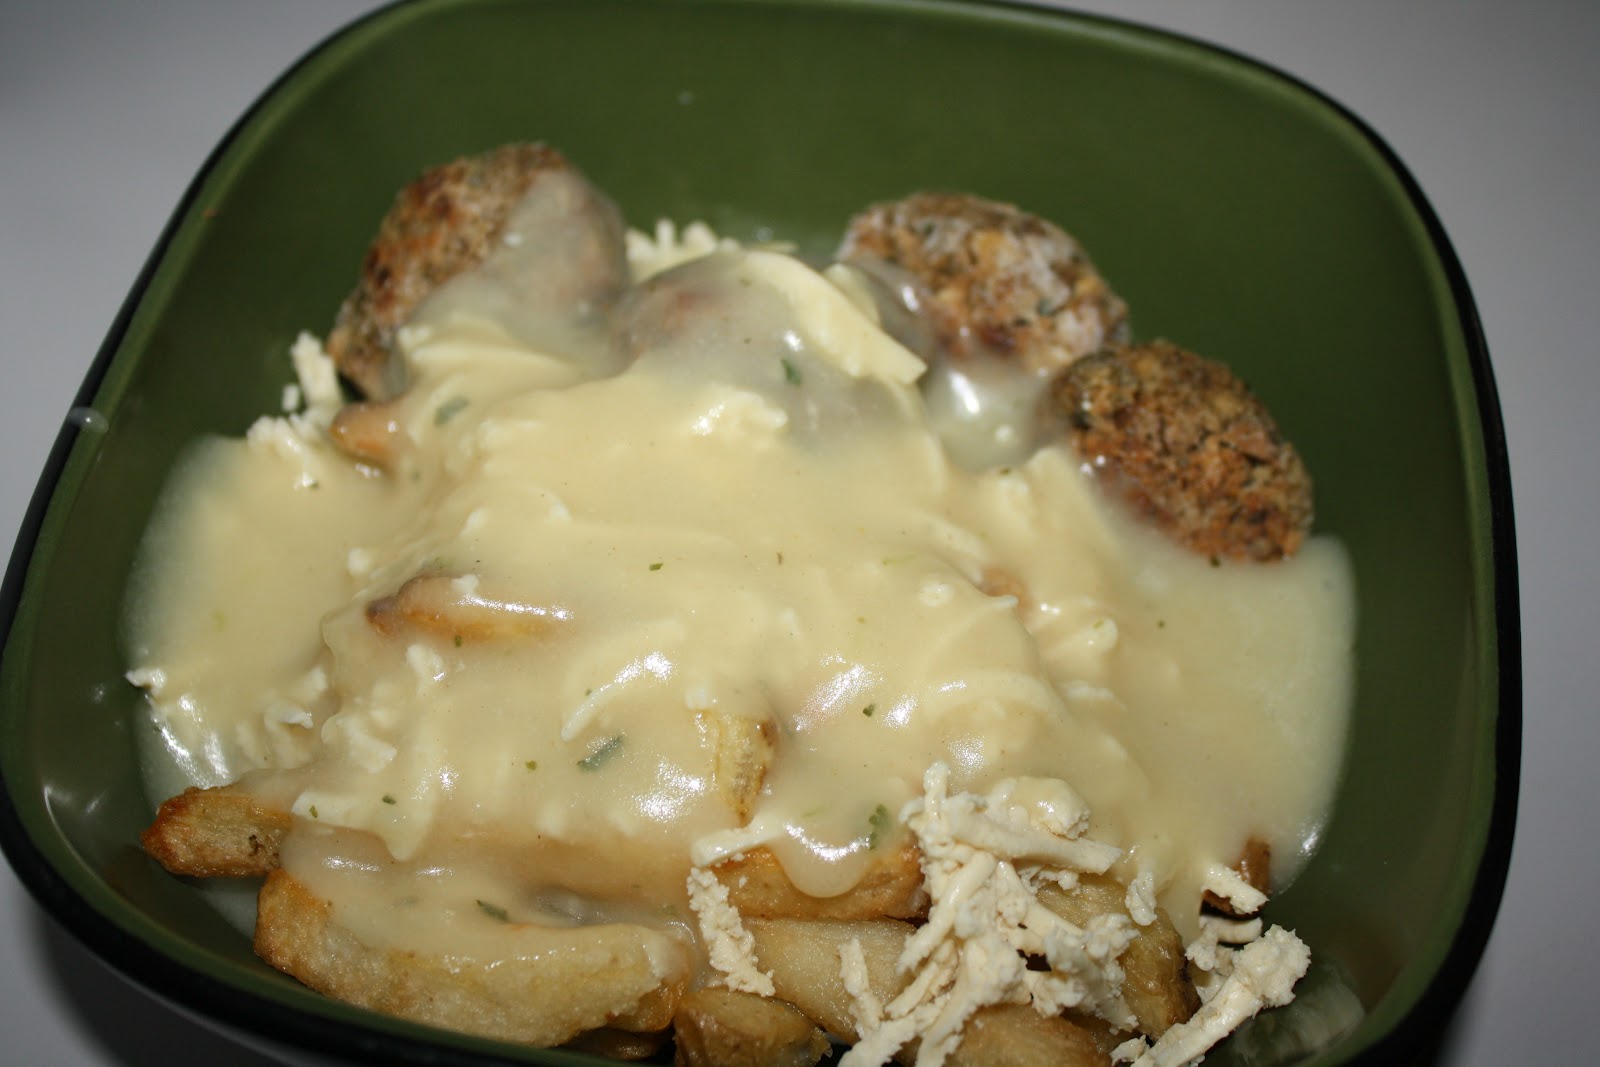
Ⓥ Vegan Kitchen: Best Poutine Ever! Ⓥ


Okay, so this is honestly not much of a "recipe" per-say but this was so delicious that I decided I had to share. ;) Before going vegan I admittedly loved the Canadian-invented poutine-- for those that don't know what a poutine is, it's french fries smothered in cheese and gravy. Healthy I know. I've had fries and vegan gravy since but not with cheese, even the vegan varieties. However, this idea came to us and I have to say, it's the best poutine I've ever had in my life (and I've been to Montreal and had them there too ;)). 

What you'll need…
Vegan Poutine:
Your choice of favourite french fries
Vegan Gravy (recipe here)
Daiya Mozarella Cheese
Tofu Balls (recipe here)--totally optional. 

I think what made this extra delicious was the perfect combination of ingredients. The fries were from the "Bite" truck in Nelson which are by far the best french fries I've ever had--they're organic and fried with non-hydrogenated vegetable oils too! So find your favourite french fries or make your own! Next we topped them with Daiya mozzarella "cheese" (thank goodness for Daiya!!) and smothered them with home-made vegan gravy (recipe here)--which melted the daiya. I also made tofu balls to go with them and it was, again, simply delish! 
  

You could easily replicate this easy "recipe" and make your own with your personal favourite french fries and take care of the rest as I described above. Seriously good! Again, I'm aware not the healthiest, but as far as unhealthy food goes, this wasn't so bad and totally worth the treat. ;)  


Photobucket

If you found this article to be helpful, please consider a small donation or visit the shop. Thank you for your love and support.

Sunday, March 4, 2012

Ⓥ Vegan Kitchen: Cheezy English Muffins! Ⓥ


I had these for lunch recently and instantly fell in love! Such a wonderful mix of flavour and totally satisfying any cheesy cravings! I used gluten-free english muffins of course--amazing!  ;) 

Cheezy English Muffins
3/4 cup Water (+ 1/3 cup)
1 Tbsp Tapioca Flour
1/2 cup raw Cashews
1 1/2 Tbsp Lemon Juice
1 1/2 Tbsp Nutritional Yeast
2 Tbsp quick-cooking oats
1/2 tsp Salt
dash Black Pepper
1/2 tsp Garlic Powder
1 tsp Tamari
English Muffins
Toppings of your choice (tofu, spinach, peppers, veggies, etc.)

[tofu & spinach topping]

Place all of the ingredients in a food processor or blender (except the extra 1/3 cup water) and blend until smooth. Takes approx. 5 minutes. 
Pour into a medium saucepan. 
Add remaining water to the blender or food processor to clean it out and then add to the saucepan. 
Cook over medium heat until thick, stirring constantly (it will thicken a lot). Add a little more water if too thick, but don't make it too runny. 

Prepare english muffins with desired toppings (my favourite is some Tofu and spinach sautéed in some tamari and spices). Top with about 2 Tbsp of the "Cheez" sauce and broil in the over or toaster oven until tops brown. Be careful not to burn them as it can happen quickly, so keep an eye on them. 


Makes approx. 3-4 English Muffins. 


Photobucket

If you found this article to be helpful, please consider a small donation or visit the shop. Thank you for your love and support.

Thursday, May 26, 2011

✌ Vegan Kitchen: Tofu Quesadillas! ✌


Some times you just have to have a nice lazy day, especially when it's all rainy out and you feel nice and cozy inside... and I muchly needed one with the amount of work going on lately. 
On these lazy days I find myself cooking and eating whatever I want. Within reason of course. It's no fun feeling like crap while you're enjoying a cozy day inside. But comfort food is awesome, especially when it tastes this good and is still healthy! Win win! 

I've always loved quesadillas and, really, when they taste this awesome how can you possibly not be vegan? 


Vegan Quesadillas:

1/4 block of Medium Tofu
2 tsp Chili powder
1/4 tsp Cumin
1/2 tsp Garlic powder
1/4 tsp Black Pepper
1/4 tsp Salt
1/2 tbsp Ketchup

2 Brown Rice Tortilla Shells (defrosted)
1/2 a Red Pepper, chopped
1/2 a Zucchini, grated
1/4 cup Spinach
1/4 cup Daiya Cheese

You can throw whatever you like in them really, but this was my mix-up and I was super excited to have daiya cheese in it! Yum! 

A good tip for this recipe (and with most recipes that call for Tofu, unless you like the natural flavor of tofu like I do ~_^) is to sauté the tofu for 10-15 minutes so it soaks up the flavor of the spices. So, that being said... 

In a medium pot or frying pan, sauté the Tofu in the spices and a little bit of water (to avoid sticking) for 10-15 minutes. Add the ketchup after about 5 minutes. 
Add the Red Peppers, Zucchini, and Spinach (and whatever else you might want to add) and continue to sauté on medium heat for another couple minutes. 


In a large frying pan, lay down the Tortilla shell, add a little cheese, toss in the Tofu mixture, layer up the rest of the cheese and fold in half. Toast for a couple minutes on each side until the cheese melts and the wrap is browned on both sides. 

Enjoy! 
This makes 1 large (sandwiching the mixture between two shells) or two halved (like I like to do, folding the shell in half), enough for two people--or one if you are feeling extra hungry. ;)


Easy lazy super yummy dinner time! And still managed to keep it healthy! ;) 


Hope you're all having a wonderful day, rain or shine!  


If you found this article to be helpful, please consider a small donation or visit the shop. Thank you for your love and support.

Monday, January 31, 2011

Ⓥ Vegan Kitchen: Vegan Gluten-free Cheeseless Falafel Pizza! Ⓥ


This yummy Vegan Pizza alternative is one of my favorites. I like to think of it as the most epic Pizza ever. I have made it many many times with all sorts of variations. 

This is NOT your average Pizza! Do not expect this to be like anything you've ever had before. It has been a favorite for anyone who has tried it and it could be yours too! ;)

It is Gluten-free, sugar-free, and free of any animal products! It is a lovely mixture of soft chewiness and crunchy crispiness! 
And it's great with just about any topping. See below for my favorites...

Prepare Crust...

Gluten-Free Pizza Crust:

1 cup Brown Rice Flour 
1/2 cup Tapioca Flour
2/3 cup Rice Milk (or other "milk")
Egg Replacer equal to 2 Eggs
1 teaspoon Salt
1 teaspoon of Garlic
1/2 teaspoon each of Black Pepper, Oregano, Basil, Thyme, Mustard.

Pre-heat oven to 350. 
In a large mixing bowl, mix ingredients together until well-mixed and can form a sticky ball (*Tip: prepare egg-replacer mixture separately Before adding to other ingredients). 
Lightly Oil Pizza tray. Spread dough evenly onto tray. Warning: it can be pretty sticky so make sure you have extra flour handy for your hands and on the top of the dough so it's easier to spread.
Bake at 350 for approximately 20 minutes or until the edges start to brown (but don't wait until the middle browns, don't worry it will still cook later and be delicious ~_^). 

Remove Crust from oven and dress it up however you'd like. Here is my favorite combination...


Sauce for the pizza:
1 small can of Tomato Paste 
(super easy and adds a subtle sweetness that contrasts nicely)

Falafel:
Make the mixture (from above recipe) but do not fry or cook it. Simply crumble and spread all or half of the mixture onto your Crust. 


Add whatever other toppings you'd like! With or without vegan cheese it's delicious! 

My favorite Toppings for Falafel Pizza:
Daiya Cheese
Spinach
Broccoli 
Black Olives

Stick Falafel Pizza back in the oven and cook at 350 for another 10-15 minutes--just until the cheese has melted and the falafel starts to crisp. You can also broil it at the end for a minute for extra crispiness. :)

And there you have it, yummy Vegan Gluten-free Pizza! Enjoy this yummy, healthy new meal!!


If you found this article to be helpful, please consider a small donation or visit the shop. Thank you for your love and support.

Wednesday, January 5, 2011

Ⓥ Vegan Kitchen: Favorite Dairy Alternatives Ⓥ

This Wednesday' Favorites is from my Vegan Kitchen! :) 

People sometimes think that being Vegan is difficult, well it's not, especially when there are soooo many dairy-alternatives out there to choose from! Here are some of my favorites that can be found in my kitchen...


Natura Rice Milk: There are sooo many milk alternatives out there! Soy milk, Almond milk, Hemp milk, Rice Milk, and more! Natura is a personal favorite--sugar free too! 


          Daiya Mozzarella Cheese: I've tried several different cheese alternatives before but this one is easily my favorite. Makes a wicked grilled cheese! :D 


Nancy's cultured Soy "yogurt":
this soygurt is amazing!! I add it to smoothies, granola, with fruit, or eat it straight from the container! Sweetened with Agave Nectar so it's sugar-free. It also comes in different flavors.


Rice Dream "ice cream": omg this stuff is amazing!! Seriously, you don't need ice cream, there are sooo many awesome alternatives! This Cocoa Marble Fudge Rice Dream is awesome! I've also tried Coconut "ice creams" before that I loved and Soy-alternatives and have loved them all! This one is sweetened with Agave Nectar though which is why I usually choose it over the soy ones, but there are some amazing flavors out there in the soy variety! 


Endangered Species Chocolate Bars: and of course, everyone needs a chocolate replacement ;). These are 72% dark chocolate and sweetened with beet sugar. Totally dairy-free :). They taste amazing, although some of you may have to get used to the "healthy" taste and adjust from gross sugary candy-bars ;). 


Earth Balance "butter": I don't actually use margarine/butter or anything much but when I do need some Earth Balance is awesome! :)


Tofutti Cream Cheese: I don't eat much cream cheese either but this stuff is awesome. Makes a great cheesecake too ;)


Soy Nice Noel Nog: I know the season has kinda passed but I thought I'd share this one anyways. I personally found regular eggnog too rich to begin with so this stuff is perfect! A great soy alternative during the holiday season with no stealing milk from baby cows ;) 


Peace & Love,
xo
~Bianca   


If you found this article to be helpful, please consider a small donation or visit the shop. Thank you for your love and support.
Related Posts Plugin for WordPress, Blogger... Save $100 on Blendtec Factory Recertified Blenders + Free Shipping