Showing posts with label dairy free. Show all posts

Sunday, May 25, 2014

Ⓥ Vegan Kitchen: Fancy Mac 'n' Cheese Ⓥ


I like to think of this recipe as an "adult" mac 'n' cheese--meaning let's add a little extra umph, some veggies, and other goodness. ;) 
I have made this sauce with just pasta for my younger brothers before as well and they loved it--and they are picky boys, so I consider this recipe rather kid friendly as well. 

vegan / gluten free/ refined sugar-free/ healthy

Fancy Mac 'n' Cheese 

Enough Pasta for 4 servings--I like to use a brown rice spiral pasta, but anything works.  

For the Sauce:
1/3 cup Rice Flour (or any other flour)
3 Tbsp Coconut Oil
3-4 cups Water
1 heaped tsp Miso 
1 1/2 Tbsp Balsamic Vinegar
2 Tbsp Tamari (or Braggs)
1/2 tsp of Garlic Salt
1 tsp Salt
1/3 tsp Turmeric
1/4 tsp ground Mustard 
dash of Black Pepper
1/4 cup Nutritional Yeast
1/2 cup Daiya shreds

1/3 cup Sunflower Seeds, soaked in water so that they are just covered

1 head of Broccoli, chopped 

Tofu Mix:*
1/2 block firm Tofu, crumbled
2 Tbsp Tamari
1 Tbsp Nutritional Yeast
dash Chili Pepper, Cumin, Black Pepper


Bring a large pot of water to a boil, and cook the pasta according to instructions on package. (depending how long your pasta takes to cook, start cooking accordingly ;)) 

For the Sauce:
While you soak the sunflowers, make the sauce.
Combine the flour, oil, miso, tamari, and vinegar together in a medium sauce pot and simmer on medium heat, stirring fairly often--until it starts to brown. Once the mixture has browned, slowly start to add water and stir consistently. Add the spices and continue to stir until your sauce is nice consistency. Add the daiya at the end. Let cool. 
In a high-speed blender (I use my blendtec, because they are amazing and use my blendtec for everything), add the sunflower seeds and sauce and blend until perfectly creamy. Add more water if necessary to get your desired consistency. 
Add back into the pot and leave to simmer on low heat. 

While cooking the sauce, if you can manage multi-tasking then make the tofu and broccoli. 
Simply sauté the tofu in tamari and spices, stirring so that it doesn't stick but allow it to brown and really soak up the flavour. 
*You could also just add in veggies dogs or faux meats of some sort, but I love the ease of cooking tofu and the better health factors. 
*I also love making tofu balls instead if you have the time. 
Add the broccoli to the tofu towards the end so it gets nice and tender but not overcooked. 

Add everything together in one large pot--you can probably use the pasta pot if you used a big one. 
Serve! Enjoy! 


Makes 4-5 servings. 
Photobucket

If you found this article to be helpful, please consider a small donation or visit the shop. Thank you for your love and support.

Thursday, February 6, 2014

♥ Amore di Mona Chocolate ♥


Love is in the air this lovely February, and that means chocolate. Am I right? Well indulging your loved ones with chocolate is only a sweet thing when you're not going to turn them into a sugar-crash monster once the chocolate is all gone. That's no fun. Plus, who wants cruelty cow milk and a clash of barely legible ingredients that you certainly shouldn't be putting in your body. Well, we can't very well give up chocolate, because life without chocolate is just not living. Fear not! Enter another amazing raw chocolate company: Amore di Mona

Amore di Mona are a new line of allergen-free, vegan, low-glycemic chocolates made with Belgian cocoa, French cocoa butter, and raw organic agave nectar. The thing I love about all these amazing conscious companies is that they tackle the issue of health when it comes to delicious treats and really add their own unique touch to their products. With Amore di Mona, they created an absolutely blissful, melt-in-your-mouth smooth succulent chocolate, and they took at a step further with their line of  "Caramela" bars with delicious caramel wrapped in dark decadent raw chocolate in a few lovely flavours.
These have become at the top of my list of favourite all-time chocolates. Every flavour was bursting with such wonderful flavours. My personal favourite was the cherry caremala bar--simply divine!
Not only are all of their chocolates gluten-free, nut-free, soy-free, non-GMO, and kosher, their commitment to health and excellence is astounding! Everything is created with high quality, natural, preservative-free, non-GMO, kosher ingredients. The cocoa butter is imported from Belgium and Holland, cocoa solids from Belgium. Madhava provides the sugar-free alternative of raw, organic, Fair Trade agave nectar. Any fruits used are fresh or sulfite free, sun dried organic. And the gluten free grains used are milled whole. 
How amazing is that?!

Lastly, Amore di Mona even has lovely Valentine's Gift Boxes, so you can still take advantage and treat your loved ones with truly lovely and sweet chocolate!

Even  better, indulge and treat yourself with a treat that won't make you feel guilty. Chocolate was meant to be enjoyed with all the wonderful health benefits in tact, so enjoy!


Find Amore di Mona:

Photobucket

If you found this article to be helpful, please consider a small donation or visit the shop. Thank you for your love and support.

Sunday, September 29, 2013

Ⓥ Apple Pie Smoothie Ⓥ


It's rainy, it's fall, it's cold, and all I want to do is cuddle up in a blanket fort and enjoy cozy, delicious and healthy snacks, breakfasts, or even desserts! Or… combine all three with this amazing smoothie recipe! ;) 
This recipe makes a great switch-up in your usual smoothie morning recipes (if you're like me and have smoothies every morning for breakfast that is). Even though it's still a cold smoothie, it feels warm and, heck, if you wanted to you could even warm it up and it would be delish! Mmmmmmm!  

Apple Pie Smoothie

3 Tbsp of Gluten-Free Oatmeal (or sub for 2 Tbsp Chia Seeds!)
2 Tbsp of almond butter or sunflower seed butter 
1 apple, chopped
¼ tsp of nutmeg
1 tsp of cinnamon
½ cup ice
1 cup coconut milk (beverage, not canned -- or hemp milk, or almond milk, or any other non-dairy milk)
1 scoop of Vanilla Protein Powder (optional -- if you don't, then add a touch of vanilla extract)
Stevia to sweeten (or other sweetener of your choice)

Cook the oats, or soak them overnight in the fridge--with 1/2 cup water. Wait until they've cooled if cooking them. 
Add all the ingredients together in a blender and blend until smooth. Add less or more liquid to get your desired consistency, and less or more sweetener to your desired sweetness. Top with a sprinkle of cinnamon. 
Makes 1 serving. Enjoy! 

*I make all my smoothies in our Blendtec Blender--it's an amazing blender and well worth the investment--and it makes the smoothies super super smooth and creamy!* 

Photobucket

If you found this article to be helpful, please consider a small donation or visit the shop. Thank you for your love and support.

Sunday, September 22, 2013

Ⓥ Vegan Kitchen: Creamy Lobster Mushroom Pasta Ⓥ


The husband and I went on a lovely hike the other day and we just so happened to stumble across our first lobster mushroom! Now, normally, mushroom picking scares me--what with the high possibility that you're dealing with poisonous mushrooms--but, fortunately, Cory had his iPhone handy (thank you technology) and we were able to google search lobster mushrooms. They have no poisonous look-a-likes, and unlike many mushrooms, they are very easy to identify. So we picked our very first ever wild mushroom. On the way back down from the hike (now that we were looking), we found a few more. How exciting! 
So we had several mushrooms, meaning it was time for a new recipe! 
While this recipe will be delicious with any mushrooms, lobster mushrooms really pack the extra incredible flavour--so if you can go wildcrafting or find some locally, I highly recommend it! 


Creamy Lobster Mushroom Pasta 

Enough Linguini Pasta for 2! 

1 large Lobster Mushroom (or two smaller ones), chopped and diced
2 cloves Garlic, minced
2 Tbsp Olive Oil (+ 1 Tbsp)
1 heaped tsp Miso
1 1/2 Tbsp Balsamic Vinegar
1/2 Tbsp Tamari
1 tsp (just under) Salt
dash Garlic Salt
dash of Black Pepper
3 Tbsp Rice Flour (or any other flour)
2 cups Water
1/4 cup Vegan Cream Cheese (I used Follow Your Heart brand)
Handful of Spinach


Bring a large pot of water to a boil, and cook the pasta according to instructions on package. (depending how long your pasta takes to cook, start cooking accordingly ;)) 

Sauté the Mushroom and Garlic in oil for several minutes on medium-high heat -- the mushrooms will release a lot of water, so wait for some of the water to reduce so that they can sauté for a few minutes.  
Add the vinegar and tamari and sauté another several minutes. 
Add the rice flour and that last Tbsp of Oil, and sauté for a minute. Add the miso, salt and spices, and slowly add water; increasing the heat a little and cook until the sauce boils and thickens, stirring fairly frequently. This usually takes about ten minutes for the sauce to fully thicken up. 
Once the sauce has thickened, add the cream cheese and spinach, and continue to stir until fully melted and blended. 
Add more water if needed. Taste-test to see if it needs more salt or pepper. 
Pour the sauce over the pasta and enjoy!
Makes 2 servings. 

Photobucket

If you found this article to be helpful, please consider a small donation or visit the shop. Thank you for your love and support.

Sunday, August 4, 2013

Ⓥ Vegan Kitchen: Stuffed Zucchini Ⓥ


It's Zucchini season and this year our garden is brimming with them for the first time. We actually can't keep up! So, obviously, it's time for some fun zucchini recipes. ;)
This recipe is super easy to make and delicious. It takes a little time but takes very little effort. Perfect! :) 
This makes a perfect summer meal, or a great side dish! 

Stuffed Zucchini

1 large Zucchini (or a few smaller ones)

1 cup Red Lentils
2 cups Water
1 tbsp Miso (veggie stock works too)
2 Garlic cloves, minced
2 Tbsp Nurtitional Yeast
1/2 tsp ground Oregano 
1/2 tsp Black Pepper
1/2 tsp Salt

Daiya cheese (optional/ or other vegan cheese)


Preheat oven to 350° F.
Cut the Zucchini lengthwise. Using a teaspoon, scoop out the centres (seeds and soft centre)--save the scooped out portion. Place the zucchini halves into a large shallow baking dish. 
In a medium saucepan, cook the red lentils in water for about 20 minutes. Chop the scooped out zucchini and add it to the pot along with the miso and spices; cook another 5-10 minutes until the lentils are fully cooked through. 
Spoon the lentil mixture into the hollowed out centres of the zucchini halves. Top with daiya cheese (optional). 
Bake in the oven for 30-45 minutes (cooking time will depend on the size of your zucchini--so check it at about the 30 minute mark by poking it with a fork--it should still be firm but not so firm that it's still hard). 
Serve and enjoy! Makes 4 servings. 


Photobucket

If you found this article to be helpful, please consider a small donation or visit the shop. Thank you for your love and support.

Sunday, July 21, 2013

Ⓥ Vegan Kitchen: Vegan Creamy Pasta Sauce Ⓥ


This recipe is super quick and simple to whip together. It's delicious and creamy and packed full of flavour. For the vegan-taste skeptics, no one will ever guess it's vegan. ;)

Vegan Creamy Pasta Sauce 

1 pound Brown Rice spiral Pasta (or pasta of your choice)

1 head Broccoli (about 1 pound), cut into small florets

2 cups plain unsweetened Soy Milk (or other non-dairy milk)
1/2 cup Vegetable Broth
1 tbsp Lemon Juice
3 cloves Garlic, peeled and pressed
1 tbsp dried Basil
2 tps dried Oregano
1/2 teaspoon Chili Powder (or to taste--optional, but it adds a nice flavour and kick)
dash of Black Pepper
1/2- 1 tsp Salt, to taste.
1 tbsp Nutritional Yeast
2 tbsp Tapioca Flour (potato or corn starch would work as well, or even any flour)


Other optional add-ins:
Chickpeas
Cauliflower, Zucchini, spinach, or other veggies 


Bring a large pot of water to a boil, and cook the pasta according to instructions on package. 
While the pasta is cooking, steam your veggies. 
While those are both cooking, make your sauce: 
Combine in a medium saucepan the soy milk, garlic, herbs and spices, and pepper. Bring to a simmer over medium-high heat, reduce heat to low, and cook, stirring frequently, for about 3 minutes. Add the tapioca starch, and stir thoroughly. Increase heat a little and cook until the sauce boils and thickens slightly, stirring every so often. Add more water if needed. Taste-test to see if it needs more salt or pepper. 
Pour the sauce over the pasta and vegetables and stir gently to coat. If the pasta needs more moisture, add a little of reserved pasta water (from the water it was cooking in). 
Serve immediately.
Makes approx. 4 servings. 


Photobucket

If you found this article to be helpful, please consider a small donation or visit the shop. Thank you for your love and support.

Sunday, June 9, 2013

Ⓥ Vegan Kitchen: Matcha Watermelon Smoothie Ⓥ


I'd been wanting to try this amazing sounding matcha smoothie recipe over at the LunchBoxBunch.com for a while. It called for watermelon which I never had on hand but now that it's the summer season they're becoming cheaper which is nice. I tried their version the first time around but didn't use a frozen banana and I do believe it makes a world of difference, so make sure your bananas are frozen when you make this recipe. I also altered the original recipe a little bit to my personal liking. And I've included optional ad-ins that I always use in my smoothies but are totally optional--I just love the health kick. ;) 
I must admit this is definitely going to be a summer favourite! I already loved matcha so much and this is probably one of my favourite matcha recipes now. Hope you enjoy as much as I do! 


Matcha Watermelon Smoothie

1 Banana, frozen
1/2 cup Watermelon cubes, frozen
1-2 tsp Matcha
1/2 Tbsp Chia seeds, soaked overnight or for at least 10 minutes
1 cup Hemp Milk (or other non-dairy milk)
touch of Stevia to sweeten (or other sweetener of your choice)

optional ad ins: 
Protein powder 
1 tbsp Hemp seeds
1 Tbsp Flax seeds
Handful of Kale or greens

Toss all the ingredients together in a high-speed blender and blend until smooth. Add less or more liquid to get your desired consistency.   
Makes 1 serving. Enjoy! 


Photobucket

If you found this article to be helpful, please consider a small donation or visit the shop. Thank you for your love and support.

Sunday, May 26, 2013

Ⓥ Vegan Kitchen: Best Gluten Free Quinoa PB Chocolate Chip Cookies! Ⓥ


I've tried many different gluten-free cookie recipes before, all have been good but not amaaaaazing. These were absolutely positively amaaaaazing! Hands down the best cookies I've ever made. Unlike lots of gluten-free cookies, they were moist, they rose, they had a nice fluffy consistency, and were simply divine! 
I added a few too many chocolate chips (which I didn't think was possible ~_^) the first time making these, so don't mind the photo at the bottom of the chocolate pouring onto the pan--I've adjusted the recipe. ;)
So without further ado, the best cookies ever! 

vegan / gluten free/ sugar-free
Gluten Free Quinoa PB Cookies

Dry Ingredients:
1 cup Quinoa Flour
1/4 cup Tapioca Flour
1/3 cup Buckwheat Flour
1/4 cup ground Flax Seed
1 tsp Baking Powder
1/4 Salt
1/2 cup vegan Chocolate Chips (or carob chips)

Wet Ingredients:
1/2 Banana
3/4 cup Peanut Butter
1/4 cup Oil
1 tsp Vanilla Extract
3/4 cup Hemp Milk (or other non-dairy milk)
2 tsp Stevia
1 Tbsp Agave (or other sweetener)

Preheat oven to 350℉. Lightly oil a baking pan.
In a large mixing bowl, mix all of the dry ingredients together. 
In a blender or food processor, toss in all of your wet ingredients and blend until frothy and smooth.
Add the wet ingredients to the dry and stir until evenly combined. 
Form into small balls and place on your baking sheet and flatten into cookies. 
Cook in the oven for 20 minutes -- until you can stick a toothpick in and it comes out clean. 
Allow to cool and then try not to devour them all in one sit. ;)
Enjoy!  


Photobucket

If you found this article to be helpful, please consider a small donation or visit the shop. Thank you for your love and support.

Sunday, May 5, 2013

Ⓥ Green Chai Smoothie Ⓥ


I love chai. And I love smoothies. This smoothie recipe combines two loves into a healthful and delicious snack or meal. You won't even taste the greens yet you'll be getting a full healthy serving of it as well as other goodness.
This is how I make this smoothie, packed full of nutrition and omegas and protein and greens, but you could omit the protein powder, flax and hemp seeds if you don't have them handy and you'll still have a divine smoothie! 
The chai I use is also a yerba mate so a healthy caffeine boost instead of black tea varieties. 

Green Chai Smoothie
1 small Banana
1 Tbsp looseleaf Chai Tea,* soaked overnight
2 Dates, soaked overnight
1 cup Water
2 Tbsp Walnuts, soaked 10 minutes
Handful of Spinach
Stevia to sweeten (or other sweetener of your choice)
3 Ice Cubes
1 Tbsp Flax Seeds
1 Tbsp Hemp Seeds
Protein Powder (optional, choose a mild tasting one like pea protein)

*I use this amazing Mate Factory Yerba Mate Chai tea that is super rich in flavour. I highly recommend getting your hands on it! Otherwise choose a chai tea that is very rich and do choose looseleaf rather than tea bags--I've tried both and they simply don't compare. 


Soak the dates and looseleaf chai tea together in the cup of water in an airtight container and refrigerate overnight. 
Throw the rest of your ingredients in a high-speed blender or good food processor. (don't blend yet)
Remove your dates from your soaked mixture and add them to the blender. Use the water in your smoothie by draining out the chai tea leaves with a tea ball or strainer small enough to capture it--if you get some leaves in there it's not the end of the world as long as you have a good blender that won't leave little bits of looseleaf tea in your drink. ;)  
Blend until smooth. Add less or more liquid to get your desired consistency.  
Makes 1 delicious serving. Enjoy! 


Photobucket

If you found this article to be helpful, please consider a small donation or visit the shop. Thank you for your love and support.

Sunday, April 14, 2013

Ⓥ Vegan Kitchen: Chocolate Mousse with Rice Crispy Crust Pie Ⓥ


I think this may be one of my new favourite desserts. It's super simple and quick to make and is heavenly divine--not to mention it's also fun to lick the spoons after you're done putting everything together. ;)
Dairy free and vegan as always, gluten free, and soy free! 


Chocolate Mousse with Crispy Crust Pie

Peanut Butter Crispy Crust:
4 heaped Tbsp Peanut Butter (smooth is best. or sub Nut Butter of choice)
1 Tbsp Agave (or use Stevia like I do, about 1-2 tsp.)
1 tsp Vanilla extract
1 heaped Tbsp Coconut Oil
1 cup Crispy Brown Rice Cereal
1 cup Crispy Flake Cereal (I use Nature's Path Millet Flakes)

Chocolate Mousse Filling:
1 cup Dark Chocolate (72%)
Organic Coconut Cream (from 1 can of Chilled Coconut Milk)**


Directions:

Make the Rice Crispy Crust:
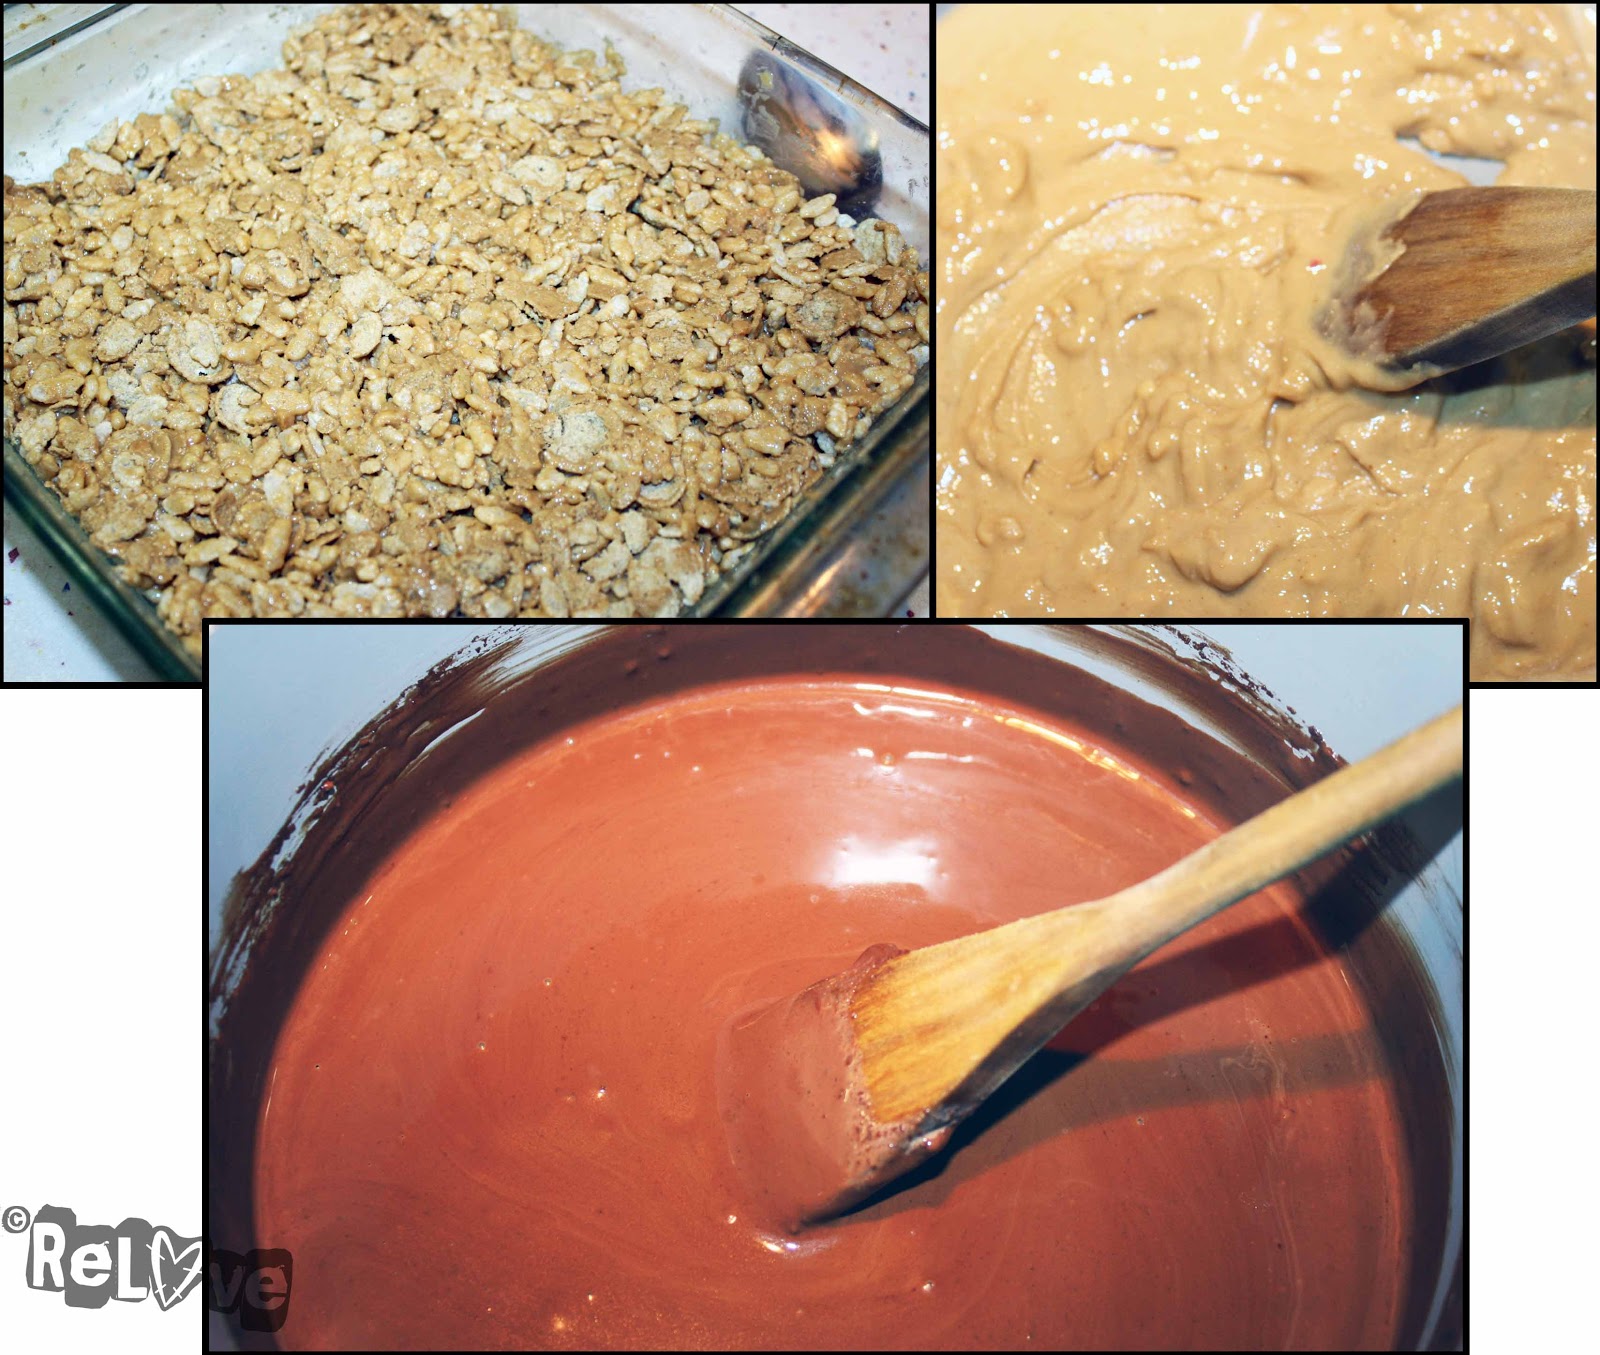
In small saucepan over medium heat, combine peanut butter, sweetener, vanilla, and coconut oil, stirring until melted together. Remove from heat and add cereal, stirring until completely coated. 
Press rice crispy mixture into a 9x13" pan, press flat, set aside to set.

Make the Chocolate Mousse:
**Without shaking, open the can of coconut milk and spoon out the thick portion at the top of the can (reserving remainder for smoothies). You must have refrigerated the can prior, overnight or longer so that the thick cream part separates from the liquid. 

Chop chocolate. In a small saucepan over low heat, whisk coconut cream until heated (this takes several minutes, but keep heat low). Add the chopped chocolate and continue to stir until chocolate is melted and mixture is smooth.

Pour over your rice crispy crust, smoothing it over top evenly. 
Place in fridge to set, this takes about an hour but if you're hungry then you can always eat it sooner, the chocolate will just not be as settled and thick. 

Enjoy! 
Makes 6-9 servings, depending how big you want to cut the pieces. ;) 


Photobucket


If you found this article to be helpful, please consider a small donation or visit the shop. Thank you for your love and support.

Sunday, March 31, 2013

Ⓥ Vegan Kitchen: 3-Ingredient Soft Serve Ice Cream Ⓥ


This recipe is super duper simple and super duper delicious. You can play around with it too to get different flavours (I'll include some favourites below). 
It is important that the bananas are frozen--unless you add more ice, but I prefer the texture you get from frozen bananas, it's like soft serve ice cream! Yum! 
Vegan, gluten and common allergen-free!  

3-Ingredient Ice Cream

2 Frozen Bananas
2 Tbsp Peanut Butter
touch of sweetener

Throw the frozen bananas into your food processor (you can use some blenders but it might not work the same — you could also use certain juicers. I make this in my Blendtec and it works great too but I usually have to add a little liquid). Then turn the processor on and let it run for about five minutes, stopping every now and then to scrape it down. The bananas should get increasingly light, fluffy, and smooth. Towards the end, add the peanut butter and sweetener if desired and continue to process. By the time you’re done, it’ll resemble a creamy bowl of soft serve! 
Eat immediately (or it will loose its texture). 
Voila! Soft serve ice cream!!! 
Makes 2 delicious servings. 


Now, for some extras for different Flavours…

Add 1 Tbsp Vanilla extract for, well vanilla. 
Add 1-2 Tbsp Cocoa for a chocolatey flavour. 
Add a scoop of Choc-a-lot Vega for a protein and chocolatey boost! 
Sub Peanut Butter for Almond Butter or Hazelnut Butter for different flavours. (you can also make this without any nut butter altogether for simple soft serve)

After you've made the ice cream, add a peanut butter larabar and pulse to get yummy chewy chunks. 
You can also pulse in any other handy desserts, like cheesecake, brownie pieces, oreo-type cookies, and so forth! Yum!
You'll never miss blizzards again! ;)  


Photobucket

If you found this article to be helpful, please consider a small donation or visit the shop. Thank you for your love and support.

Sunday, March 24, 2013

Ⓥ Vegan Kitchen: Easy "Cheesy" Potatoes! Ⓥ


This is a delicious, creamy, easy and quick recipe to whip up. It's the perfect comfort food and/or side dish to any meal and will leave any cheesy cravings satisfied. 
This recipe is gluten free, dairy free (and vegan of course), free of nuts, and free of soy--for those with lots of allergies like myself. ;)  

Easy "Cheesy" Potatoes

1 Large Sweet Potato (or regular potatoes)
1 Tbsp Earth Balance, or vegan margarine
1 Tbsp Rice flour (or other flour)
1/4 cup vegetable broth
4 Tbsp Nutritional Yeast
1 Tbsp Lemon Juice
3/4 tsp Salt
1 tsp Mustard, ground
1/2 tsp Garlic salt
1/2 tsp Turmeric 
about 1/2 cup "Milk" (I like to use coconut because it's a little creamier)


Chop up your potatoes and in a medium pot, boil them until almost cooked. Don't overcook them though, you want to be able to be firm but able to poke them with a fork but for them not to be mushy.  
Drain the water. 
In the same pot, add the earth balance, stock, and spices and stir for a moment. Add the flour, nutritional yeast, and lemon juice, and then gradually add the milk, stirring constantly. The flour will thicken up the sauce so you can add more or less milk depending on how creamy you want it to be. Cook for a few minutes until your sauce has thickened up. 
Serve and enjoy! Super easy cheesy potatoes! 
Makes 2 servings. If you want larger portions just double up the recipe. 


This recipe has been shared at: Fat Tuesday
Photobucket


If you found this article to be helpful, please consider a small donation or visit the shop. Thank you for your love and support.

Sunday, March 10, 2013

Ⓥ Nutty Granola Ⓥ


I've been meaning to make granola forever now. I love granola, it's just so good and delicious and crunchy and wholesome. But… I can't eat cane sugar, which pretty much cuts out all possible buying options for granola cereals. So, I figured it was about time I made some! It's really easy and doesn't take that much time, which is why I have no good reason for not doing this sooner. This granola is super delicious, with a lovely coconutty-nutty flavour. Plus it's healthy and packed full of nutrition and gives you breakfast for the whole week--or longer.
Anyway, enough from me, let's make some granola! 
This recipe is vegan (as always) and can easily be made gluten-free by using gluten-free oats. :)

Nutty Granola
Dry:
3 cups rolled oats
1/2 cup almonds or peanuts, roughly chopped
1/2 cup walnuts, roughly chopped
1/4 cup raw sunflower seeds
1/4 cup raw pumpkin seeds
2 tbsp flax seeds
1/4 cup unsweetened shredded coconut
1/3 cup raisins
1/4 cup cacao nibs (or vegan chocolate chips)
1 tsp ground cinnamon
Pinch of ground nutmeg
3/4 tsp kosher salt

Wet: 
1/4 cup of agave nectar (or use a tbsp of stevia with a touch of agave like I do)
2 tbsp coconut oil
1/4 cup peanut butter
1/4 cup of hot water

Preheat oven to 300℉
In a medium saucepan over medium heat, add the wet ingredients. Stir well. Bring to a boil and then simmer on low for 5-10 minutes, stirring frequently.
In a very large mixing bowl, mix together the dry ingredients.
Add the wet mixture (while still warm) over top the dry mixture and stir well. Stir until thoroughly combined (don't miss any!).
Spread onto a pan lined with aluminium foil (greatly helpful in preventing sticking) and bake in the oven for 20-30 minutes. Make sure you give the granola a good stir every 7-10 minutes to ensure even baking. Keep an eye on it as well as the oats can catch quickly if you don't. 
Allow to cool for 30 minutes on the pan before serving. The granola will stiffen up as it cools.
Makes about 6 cups and will keep for 1 month in the fridge in an air-tight container.
Enjoy with some lovely almond milk for an extra nutty flavour!


Photobucket

If you found this article to be helpful, please consider a small donation or visit the shop. Thank you for your love and support.

Sunday, January 27, 2013

Ⓥ Vegan Kitchen: Cheezy Pumpkin Casserole Ⓥ


This lovely recipe is rich and creamy and packed full of goodness. With a lovely subtle squash taste and a cheesy flavour, it makes for perfect comfort food while still staying healthy!  
Use gluten-free pasta (like I do) to keep this recipe gluten free. :)

Cheezy Pumpkin Casserole

Sauce:
1 can Pumpkin Puree
1/3 cup Cashews, soaked for at least 10 minutes
1 cup Vegetable Broth
1/2 cup Coconut Milk (beverage kind, or other non-dairy milk)
4 Tbsp Nutritional Yeast
1 1/2 tsp Salt
1/2 tsp Garlic Powder
dash of Black Pepper
1-2 cups water for consistency
1/3 cup Daiya, or other vegan cheese

1 350g pack of penne or other pasta
1 Large Sweet Potato
3-4 small potatoes
1/2 head of Cauliflower
1 can Chickpeas
1/2 cup Daiya (for top)

Chop the potatoes and cauliflower into bite-sized pieces. 
In a medium-sized pot, boil the potatoes and sweet potato in water until cooked and you can poke them with a fork.  


Blend the cashews in a food processor or blender, slowly adding the vegetable broth, until smooth. 
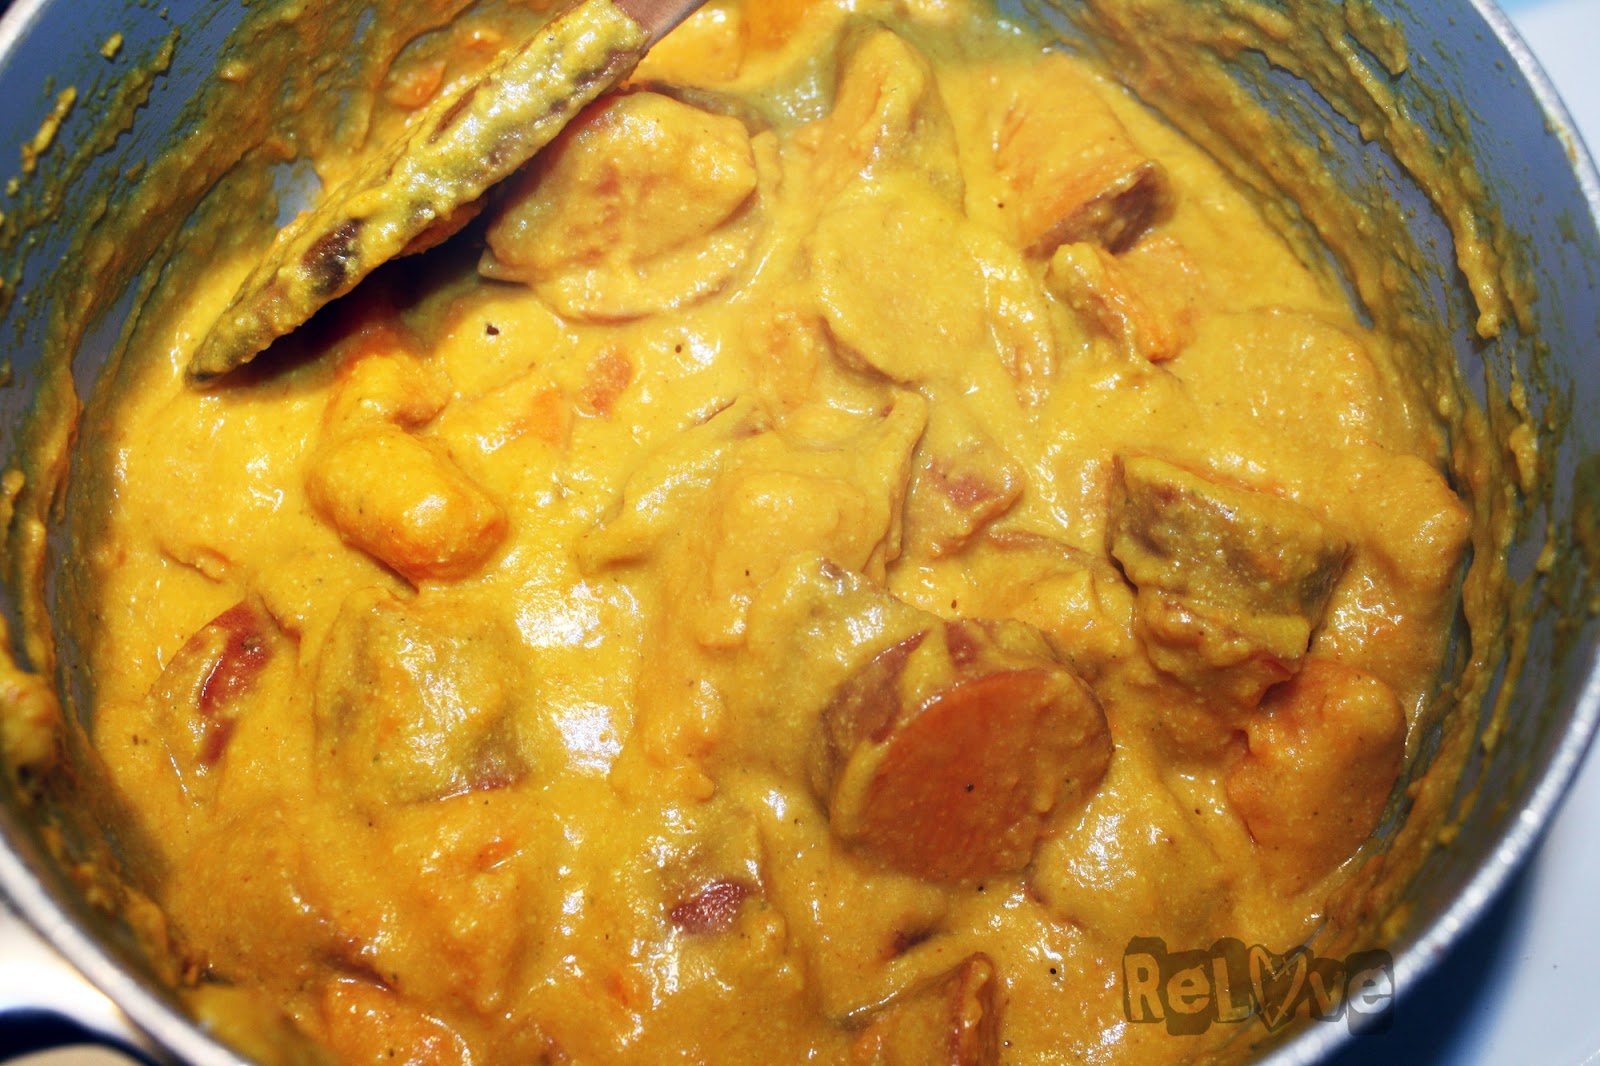
In a large pot, add the cashew mix along with the rest of the sauce ingredients (except the water) and cook on medium heat, whisking to get out any clumps and gradually adding the water as necessary. I never measure the exact amount of liquid I use, so you want it to be nice and creamy but not too runny or too thick. Cook on medium heat for about 10 minutes. 
Add in the cauliflower and chickpeas, and cook for another 10 minutes. 
Add the potatoes, at which point you might want to add a bit more liquid. 
While everything else is cooking, boil your pasta to the directions on the package. Once the pasta is cooked, add it into the rest of your large pot with the cheese mixture. Again, you might want to add more liquid at this point. 
Preheat oven to 350° F. 
Pour your mixture into a large casserole dish and sprinkle the remaining 1/2 cup of daiya on top to evenly coat. Bake in the oven for about 10 minutes, broiling at the end to brown the top. 
Serve up and enjoy! 
Makes about 6 large servings. 
*If you want to make not quite as much then you can use less pasta and less veggies, therefor less water and less food. ;) 


Photobucket

If you found this article to be helpful, please consider a small donation or visit the shop. Thank you for your love and support.

Sunday, January 20, 2013

Ⓥ Vegan Kitchen: "Cheezy" Kale Chips! Ⓥ


This is my second kale chip recipe I'm posting, and I know I went off about how amazing the last recipe was, but for real, this recipe is the best damn thing ever created!! ;) 
We make a batch every couple weeks and eat most of them entirely too quickly. Well, at least they're super healthy! 
These are packed full of flavour with a rich "cheesy" flavour. The trick with these is to dehydrate or cook them just the right amount, so be sure to keep an eye on them. You want them to be perfectly crispy but not too dry, but you don't want them to be soggy either. Practice means perfection! ;)

We make these in our kick-ass Excalibur dehydrator, but I've included general baking instructions to bake these in the oven as well--I just haven't personally made them in the oven, so keep an eye on them and let me know how they turn out. ;)  


"Cheezy" Kale Chips

*2 large bunches of Kale, chopped up (larger stems removed)
1 cup raw Cashews, soaked for at least 10 minutes. 
4 Tbsp Nutritional Yeast
2 Tbsp Lemon Juice
2 Tbsp Hemp Oil (or other healthy oil)
1 tsp Salt
1/2 tsp Black Pepper
a little water for consistency

Recipe Variation:
If you have a cashew sensitivity then replace the 1 cup of cashews for about 3/4 cup of sunflower seeds. Soak them for about 10 minutes and follow the rest of the recipe as usual. 

*we don't really measure the kale, we generally buy two bunches from the farmer's market or co-op grocery store and chop it up so that it fills a large bowl as pictured. ;) 

Chop up your kale into larger "chip"-sized pieces--don't go too small as they will shrink up a lot--and remove the larger stems. 
In a food processor, blend up all your ingredients, adding a little water until you get a nice creamy consistency. 
Toss your kale into a large mixing bowl and pour your mixture over, thoroughly mixing so that all the kale is evenly coated. 


In the dehydrator:
Line up your kale in your dehydrator trays and dehydrate for approximately 6-8 hours. Like I said, keep an eye on them, the time will vary by how much coating is on your kale and what kind of kale you used. 
Why I love the dehydrator method? Because you're keeping them raw (depending on your ingredients) and therefor packed full of all their beneficial nutrients. :)


In the Oven:
Spread the kale evenly on a large cooking sheet. Now, there are two ways of doing them in the oven…
One, is the attempt to keep more of the nutrients by cooking at a lower temperature: Preheat oven to 200° F and bake for 2-3 hours. 
Two, is if you're impatient but you'll kill a large portion of the nutrient value: Preheat oven to 350° F and bake for approximately 10 to 15 minutes.
Either way, cook until the kale chips are crispy and the edges are lightly browned--not burnt! 


Enjoy! ;) 

Photobucket Save $100 on Blendtec Factory Recertified Blenders + Free Shipping

If you found this article to be helpful, please consider a small donation or visit the shop. Thank you for your love and support.
Related Posts Plugin for WordPress, Blogger... Save $100 on Blendtec Factory Recertified Blenders + Free Shipping