Showing posts with label dessert. Show all posts

Sunday, November 24, 2013

Ⓥ Apple Pie Smoothie #2 Ⓥ


Apple Pie smoothies are the greatest, aren't they? Well, here's another Apple Pie smoothie for you that is a little different and equally awesome than the last one I posted. 
Enjoy!!  

vegan / gluten free/ sugar-free/ raw

Apple Pie Smoothie

1 Apple, chopped and cored
1 Banana
3 Dates, soaked overnight (to soften them up)
1 Tbsp Walnuts 
1 tsp of Cinnamon
¼ tsp of ground Nutmeg
⅛ tsp of ground Ginger
¼ cup ice
1 cup Water
Stevia to sweeten (or other sweetener of your choice)

Add all the ingredients together in a blender and blend until smooth. Add less or more liquid to get your desired consistency, and less or more sweetener to your desired sweetness. 
Top with a sprinkle of cinnamon. 
Makes 1 serving. Enjoy! 

*I make all my smoothies in our Blendtec Blender--it's an amazing blender and well worth the investment--and it makes the smoothies super super smooth and creamy!* 

Photobucket

If you found this article to be helpful, please consider a small donation or visit the shop. Thank you for your love and support.

Ⓥ Vegan Kitchen: Rice Pudding Ⓥ


I love this recipe as a healthy breakfast alternative. Of course, it makes a great dessert as well. ;) 
Super easy and healthy!  

vegan / gluten free/ sugar-free

Rice Pudding

1 1/2 cups cooked Brown Rice*
1 1/4 cups Coconut Milk**
1/4 cup raisins
1/4 cup Agave or maple syrup (or use a little less and use stevia as well)
1 tsp Vanilla
1/2 tsp Cinnamon
1/4 tsp ground Ginger
1/8 tsp ground Nutmeg

*I like to make a batch of Brown Rice for a couple of days for rice bowls and, well, for this recipe. If you don't have rice already made then either make it the night before (since it takes about 50minutes to cook brown rice) or, if you have time, make it in the morning.
**Coconut Milk: use the liquid of a chilled can (I always like to store mine in a cold room or keep one handy in the fridge for recipes), and part of the thick part so that you get enough--store the rest for another recipe for your week :)

In a medium saucepan, add the rice with all of your ingredients. Stir well to combine, and cook the mixture over low heat until warmed and you get a nice consistency that isn't too watery but isn't too dry (add a little water or more coconut milk as necessary). 
Sprinkle with a little cinnamon and serve warm--or chill in the fridge, both are delish! 
Serves 2-3
Enjoy! 


Photobucket

If you found this article to be helpful, please consider a small donation or visit the shop. Thank you for your love and support.

Sunday, October 27, 2013

Ⓥ Vegan Kitchen: Pumpkin Pie Ⓥ


I can't actually believe that I haven't posted a traditional pumpkin pie recipe yet! I made this last week and posted a photo on instagram and immediately had people requesting the recipe. So, here it is! 
For whatever reason, pumpkin pie mixtures have tended to be runny for me in the past (looking online, I've seen lots of others have this same problem), even when following various recipes perfectly. I've found a few tricks that help, as well as the right cooking times-and allowing the pie to set overnight. So hopefully you, too, will enjoy non-runny pumpkin pie. ;)  I've added some helpful hints and ingredients that will help below.

Anyway, what's more amazing than pumpkin pie this time of year? Nothing, that's what! Enjoy this healthy, easy, delicious recipe for yourself and those you love to share with. ;) 

Pumpkin Pie

Pie Crust:
2 cups Almonds, (or pecans or walnuts)
1/2 cup Dates
Dash of sea salt

Blend the crust ingredients together in a food processor or high speed blender. You want it to be blended enough to hold together, but not so blended that you end up with almond butter. ;) Evenly distribute in the bottom of a lightly oiled pie plate, pressing it down evenly.


Pumpkin Pie Filling:

1 16-oz can of Pumpkin Puree (unsweetened)
1/4 cup Tapioca Starch 
1/2 cup Agave (or sweeten to taste with stevia and just add a touch of agave)
1 tsp Cinnamon
1/2 tsp Ginger, ground
1/4 tsp Nutmeg
1 tsp Vanilla
1/4 cup almond milk or water 
1 tbsp Coconut oil (optional, but highly recommended)

Preheat oven to 425.
In a food processor, blender, or even just a large bowl, combine your ingredients until well mixed. 
Pour into your pie crust. 
Bake for 10 minutes at 425°F, and then reduce oven temperature to 350°F; bake until filling is set, about 50 minutes--check it frequently so you don't burn the crust.
Let cool and set overnight in the refrigerator. 
The coconut oil helps to solidify the pumpkin mixture once you take it out of the oven and allow it to set overnight, this is why I highly recommend using it. You don't Need it, it will still taste amazing without it, but it just might be a little less firm. 

Top with Coconut Whipped Cream (super easy recipe here) and enjoy! :) 


Photobucket

If you found this article to be helpful, please consider a small donation or visit the shop. Thank you for your love and support.

Sunday, September 15, 2013

Ⓥ Vegan Kitchen: Bliss Ball Protein Bites Ⓥ


So, I was hungry for a snack the other day and had been wanting to make some "bliss balls" for some time. I'd never really looked up a recipe, and decided to just throw together whatever I had on hand. As it turned out, these were amazing and like heaven in my mouth. The texture is a little sticky to eat but totally amazing. 

vegan / gluten free/ sugar-free /raw

Bliss Ball Protein Bites

1/2 cup Walnuts
1/2 cup Dates
2 heaped Tbsp ground Flaxseed
2 Tbsp Hemp Seeds
2 heaped Tbsp Sunflower Seed Butter
1 scoop Chocolate Vega
1 Tbsp Maca
1 Tbsp Agave
2 Tbsp Shredded Coconut


In a blender or food processor*, pulse the walnuts until grounded, but not quite a flour. 
Add the rest of the ingredients, except the dates and coconut, and pulse until well combined. 
Add the dates and pulse until you have a sticky mixture.
Pulse in the coconut shreds so it's just mixed.  
Form into balls. 
Serve immediately or refrigerate a couple hours or overnight to harden them out a bit. 
Double up or triple the recipe to make more! 
Voila!   


*I used my blendtec blender and these took a matter of seconds (literally!) to make. If you have a food processor or regular blender it can take several minutes for the nuts and dates to break down, but totally worth the wait! 

I can't wait to experiment with more flavours and play around with the texture more--and maybe the appearance to make them look prettier. ;) But as they are, they absolutely heavenly! Like little balls of nutella! How amazing is that?! 

Enjoy! 

Photobucket

If you found this article to be helpful, please consider a small donation or visit the shop. Thank you for your love and support.

Sunday, May 26, 2013

Ⓥ Vegan Kitchen: Best Gluten Free Quinoa PB Chocolate Chip Cookies! Ⓥ


I've tried many different gluten-free cookie recipes before, all have been good but not amaaaaazing. These were absolutely positively amaaaaazing! Hands down the best cookies I've ever made. Unlike lots of gluten-free cookies, they were moist, they rose, they had a nice fluffy consistency, and were simply divine! 
I added a few too many chocolate chips (which I didn't think was possible ~_^) the first time making these, so don't mind the photo at the bottom of the chocolate pouring onto the pan--I've adjusted the recipe. ;)
So without further ado, the best cookies ever! 

vegan / gluten free/ sugar-free
Gluten Free Quinoa PB Cookies

Dry Ingredients:
1 cup Quinoa Flour
1/4 cup Tapioca Flour
1/3 cup Buckwheat Flour
1/4 cup ground Flax Seed
1 tsp Baking Powder
1/4 Salt
1/2 cup vegan Chocolate Chips (or carob chips)

Wet Ingredients:
1/2 Banana
3/4 cup Peanut Butter
1/4 cup Oil
1 tsp Vanilla Extract
3/4 cup Hemp Milk (or other non-dairy milk)
2 tsp Stevia
1 Tbsp Agave (or other sweetener)

Preheat oven to 350℉. Lightly oil a baking pan.
In a large mixing bowl, mix all of the dry ingredients together. 
In a blender or food processor, toss in all of your wet ingredients and blend until frothy and smooth.
Add the wet ingredients to the dry and stir until evenly combined. 
Form into small balls and place on your baking sheet and flatten into cookies. 
Cook in the oven for 20 minutes -- until you can stick a toothpick in and it comes out clean. 
Allow to cool and then try not to devour them all in one sit. ;)
Enjoy!  


Photobucket

If you found this article to be helpful, please consider a small donation or visit the shop. Thank you for your love and support.

Sunday, April 14, 2013

Ⓥ Vegan Kitchen: Chocolate Mousse with Rice Crispy Crust Pie Ⓥ


I think this may be one of my new favourite desserts. It's super simple and quick to make and is heavenly divine--not to mention it's also fun to lick the spoons after you're done putting everything together. ;)
Dairy free and vegan as always, gluten free, and soy free! 


Chocolate Mousse with Crispy Crust Pie

Peanut Butter Crispy Crust:
4 heaped Tbsp Peanut Butter (smooth is best. or sub Nut Butter of choice)
1 Tbsp Agave (or use Stevia like I do, about 1-2 tsp.)
1 tsp Vanilla extract
1 heaped Tbsp Coconut Oil
1 cup Crispy Brown Rice Cereal
1 cup Crispy Flake Cereal (I use Nature's Path Millet Flakes)

Chocolate Mousse Filling:
1 cup Dark Chocolate (72%)
Organic Coconut Cream (from 1 can of Chilled Coconut Milk)**


Directions:

Make the Rice Crispy Crust:
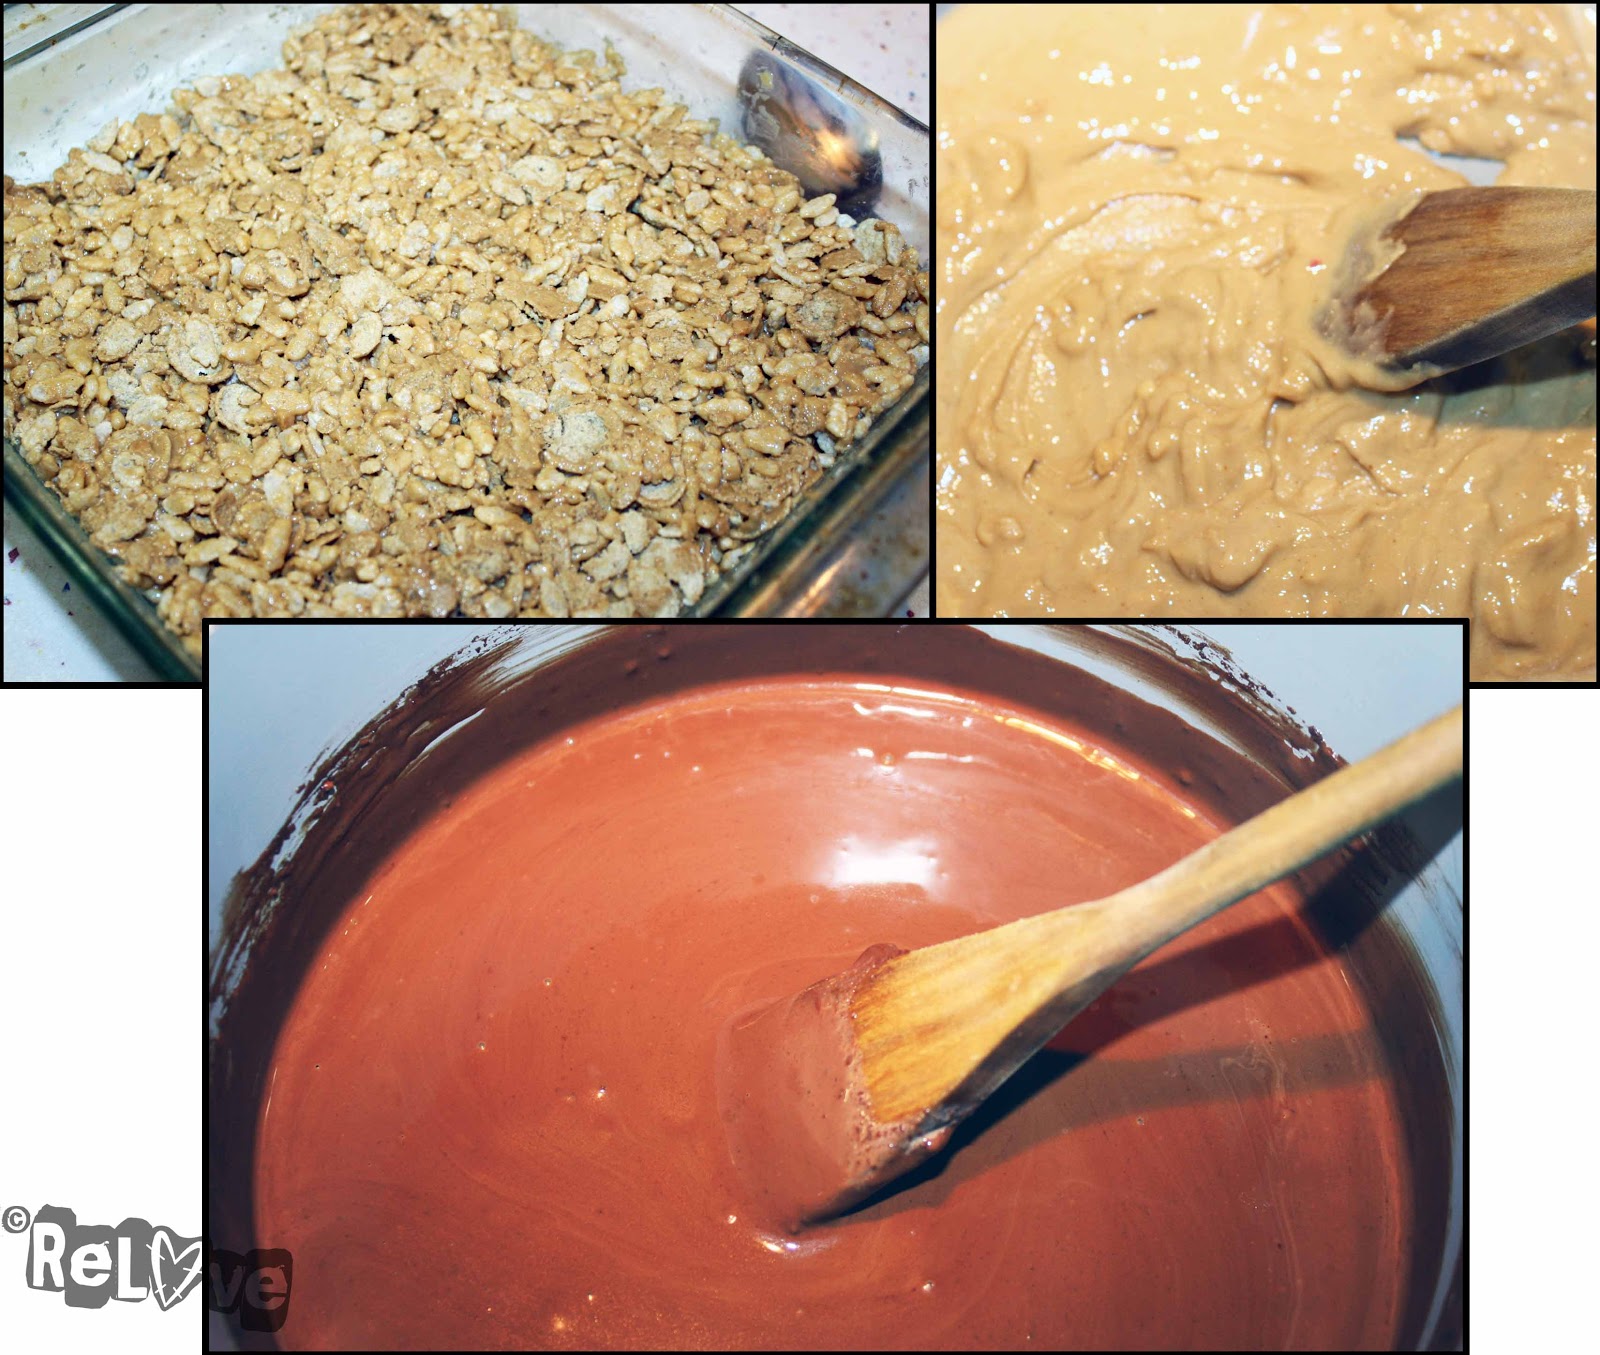
In small saucepan over medium heat, combine peanut butter, sweetener, vanilla, and coconut oil, stirring until melted together. Remove from heat and add cereal, stirring until completely coated. 
Press rice crispy mixture into a 9x13" pan, press flat, set aside to set.

Make the Chocolate Mousse:
**Without shaking, open the can of coconut milk and spoon out the thick portion at the top of the can (reserving remainder for smoothies). You must have refrigerated the can prior, overnight or longer so that the thick cream part separates from the liquid. 

Chop chocolate. In a small saucepan over low heat, whisk coconut cream until heated (this takes several minutes, but keep heat low). Add the chopped chocolate and continue to stir until chocolate is melted and mixture is smooth.

Pour over your rice crispy crust, smoothing it over top evenly. 
Place in fridge to set, this takes about an hour but if you're hungry then you can always eat it sooner, the chocolate will just not be as settled and thick. 

Enjoy! 
Makes 6-9 servings, depending how big you want to cut the pieces. ;) 


Photobucket


If you found this article to be helpful, please consider a small donation or visit the shop. Thank you for your love and support.

Sunday, March 31, 2013

Ⓥ Vegan Kitchen: 3-Ingredient Soft Serve Ice Cream Ⓥ


This recipe is super duper simple and super duper delicious. You can play around with it too to get different flavours (I'll include some favourites below). 
It is important that the bananas are frozen--unless you add more ice, but I prefer the texture you get from frozen bananas, it's like soft serve ice cream! Yum! 
Vegan, gluten and common allergen-free!  

3-Ingredient Ice Cream

2 Frozen Bananas
2 Tbsp Peanut Butter
touch of sweetener

Throw the frozen bananas into your food processor (you can use some blenders but it might not work the same — you could also use certain juicers. I make this in my Blendtec and it works great too but I usually have to add a little liquid). Then turn the processor on and let it run for about five minutes, stopping every now and then to scrape it down. The bananas should get increasingly light, fluffy, and smooth. Towards the end, add the peanut butter and sweetener if desired and continue to process. By the time you’re done, it’ll resemble a creamy bowl of soft serve! 
Eat immediately (or it will loose its texture). 
Voila! Soft serve ice cream!!! 
Makes 2 delicious servings. 


Now, for some extras for different Flavours…

Add 1 Tbsp Vanilla extract for, well vanilla. 
Add 1-2 Tbsp Cocoa for a chocolatey flavour. 
Add a scoop of Choc-a-lot Vega for a protein and chocolatey boost! 
Sub Peanut Butter for Almond Butter or Hazelnut Butter for different flavours. (you can also make this without any nut butter altogether for simple soft serve)

After you've made the ice cream, add a peanut butter larabar and pulse to get yummy chewy chunks. 
You can also pulse in any other handy desserts, like cheesecake, brownie pieces, oreo-type cookies, and so forth! Yum!
You'll never miss blizzards again! ;)  


Photobucket

If you found this article to be helpful, please consider a small donation or visit the shop. Thank you for your love and support.

Ⓥ Vegan Kitchen: Chocolate Mousse #2 Ⓥ


I love avocado pudding. It's amazing. It's bliss. Oh, and it's healthy! *gasp*
This is my second avocado pudding, this one is a little thicker with an almost cheesecake-like texture to it. It's simply divine! 
As always, vegan and gluten-free! Also sugar free and free of most common allergens. 

Avocado Pudding

6 pitted Dates (soaked at least 10 minutes)
1 Avocado
1/4 cup Cocoa or Cacao powder
1 Tbsp Vanilla
1/2 tsp Cinnamon
1/2 tsp Salt
2 tsp Stevia (I use Now brand)
2 heaped Tbsp Coconut Oil
1/2 cup water (soak the dates in it and use the water)


Pit your avocado and scoop out the "meat" (if this wasn't obvious ;p) 
Place all the ingredients in a Food Processor or Blender and blend until smooth.
Add more water or vegan milk to get desired consistency. You want it to be thick and creamy. Place in fridge for an hour or so where it will solidify a bit to give it a lovely texture. 
Makes 2 large or 4 small servings. Enjoy!


Photobucket

If you found this article to be helpful, please consider a small donation or visit the shop. Thank you for your love and support.
Sunday, January 13, 2013

Ⓥ Black Bean Brownies with Peanut Butter Pumpkin Swirl Ⓥ


I've shared a black bean brownie recipe before, but here's a new delicious spin on the simpler recipe that is now my favourite. These are lovely and perfectly rich, packed with flavour, and actually healthy, yayy! 
These are vegan (as always), gluten-free, refined-sugar free--and can even be completely sugar free by sweetening with just stevia, which has been my preference.  

Black Bean Brownies:
1 can Black Beans (drained and rinsed)
2 very ripe Bananas
1/4 cup Cocoa Powder
1/3 cup Pumpkin Puree
2 heaped Tbsp Coconut Oil
Stevia or 1/3 cup Agave Nectar (add more or less to your desired sweetness)
1 tsp Cinnamon
1 Tbsp Vanilla Extract
1/2 tsp Baking Powder
1/4 tsp Sea Salt
1/4 cup instant Oats (choose gluten free ones for gluten-intolerance)
1/4 cup vegan Chocolate Chips (optional)

Peanut Butter Pumpkin Swirl:
1/3 cup Peanut Butter, smooth
1/3 cup Pumpkin Puree
approx. 1/4 cup Almond Milk (or other non-dairy milk)
1 Tbsp Agave or Stevia to sweeten

Preheat oven to 350 F. 
First, make the Brownie part by combining all of your ingredients, except the oats and chocolate chips, in a food processor and blend until smooth. Add the oats and pulse another couple minutes to mix. Fold in the chocolate chips with a spoon or by pulsing on the food processor. 
Lightly grease an 8x8 baking dish. Evenly spread the batter into the dish. 
Now, using your food processor again, combine the peanut butter pumpkin swirl ingredients and blend until smooth, slowly adding the Almond Milk to get a smooth consistency (add more or less to reach that smooth consistency). 
Evenly dollop the mixture on top of the batter. Pull a knife back and forth lightly through the top of the batter to create your swirls.
Place in oven and bake for approx. 45-50 minutes, until you can poke it with a fork or toothpick and it comes out clean. 
Remove from oven and let set for at least 10 minutes. 
Gently cut your brownies, serve, and enjoy! 


[apologies for bad iPhone photos ;p]


Photobucket

If you found this article to be helpful, please consider a small donation or visit the shop. Thank you for your love and support.

Sunday, December 16, 2012

Ⓥ Cheesecake Smoothie Shake! Ⓥ


Don't feel like making a full cheesecake? Well here's a quick and delicious fix, though it does take a tiny bit of preplanning. 
Makes a great dessert smoothie or even breakfast smoothie since it's healthy! :) 

Cheesecake Smoothie Shake

2 Tbsp Cashews, soaked
3 pitted Dates, soaked
1 Tbsp Chia seeds, soaked
1/2 cup water
1 small Banana
1 Tbsp Lemon Juice
3/4 cup Almond Milk
1 tsp Vanilla extract
Stevia to sweeten (or other sweetener of your choice)


Soak the cashews, dates, and chia in about 1/2 cup water in a sealable container in the fridge overnight. 
Toss all the ingredients together in a blender or food processor and blend until smooth. Add less or more liquid to get your desired consistency and sweeten to taste.  
Makes 1 large or two small servings. Enjoy! 


Photobucket

If you found this article to be helpful, please consider a small donation or visit the shop. Thank you for your love and support.

Sunday, October 21, 2012

Ⓥ Vegan Kitchen: Raw Pumpkin Pie Ⓥ


This is surprisingly my first pumpkin pie recipe *gasp* and I figured it was about time I did one. This is recipe #1 of a few different pumpkin pie recipes I'll be posting. ;) 
Now, this is not your traditional pumpkin pie, it is raw! If you don't have pumpkins handy then you could just buy the store-bought canned stuff and it wouldn't be raw but you could still make it no-bake and I'm sure it would still be equally amazing. 
Actually, to be honest, this was definitely something new to me. Raw pumpkin is pretty hefty, so if you make this be sure you have lots of people to share it with as you only need a small piece to completely fill you up. The texture, honestly, was a little odd to me at first as well as it's pretty hard to completely puree uncooked pumpkin. Still, topped with a little coconut whipped cream this was divine. Just not your traditional pumpkin pie. ;)

Raw Pumpkin Pie

Pie Crust:

2 cups Almonds, (or pecans or walnuts)
1/2 cup Dates, soaked
Dash of sea salt

Soak the dates for at least 30 minutes. 
Blend the crust ingredients together in a food processor or high speed blender. You want it to be blended enough to hold together, but not so blended that you end up with almond butter. ;) Evenly distribute in the bottom of a pie plate.
For a different more "pie-like" variation of the crust, soak the almonds along with the dates. I personally prefer the texture and flavour of the nuts not soaked, but did this time around and it had a bit more of a traditional sort of pie crust taste.

Pumpkin Pie Filling:

2 cups shredded Pumpkin
1 cup Dates, soaked
2 tsp Cinnamon
1 tsp Ginger, ground
1 tsp Nutmeg
1 tsp Coconut oil
1 tsp Vanilla
1/4 cup almond milk or water to help blend

Again, soak the dates for at least 30 minutes. 
Chop the pumpkin into chunks and then "shred" it in a food processor or blender until it becomes more of a puree. Add in the rest of the filling ingredients and blender until smooth--this may take a while so be patient. ;) Add more water as you go so that it blends easier, but don't overdo it and make it too runny. 

Pour pumpkin filling into the pie crust and refrigerate for at least 30 minutes before serving. 
Top with Coconut Whipped Cream, enjoy! :) 


Photobucket

If you found this article to be helpful, please consider a small donation or visit the shop. Thank you for your love and support.

Ⓥ Vegan Kitchen: Coconut Whipped Cream Ⓥ


This is so simple and delicious you'll wonder why you haven't been doing this for years! Fluffy, smooth, delicious, and free of unhealthy dairy and sugar! What's not to love?! 
Use it to top desserts, for sundaes, smoothies, cupcakes! You can also play around with different flavours! Boooyah! 

Coconut Whipped Cream

1 can full-fat Coconut Milk, chilled
1 tsp Vanilla
Agave, Stevia, or whatever you choose to sweeten

The essential part about this recipe is that you need to refrigerate the coconut milk overnight, so there is a little planning ahead. But the fun part is that you could just keep an extra can or two of coconut milk in your fridge for such an occasion. ;)


Once the coconut milk is chilled, flip the can upside down. This will leave it so that the liquid is now on top and your creamy coconut is on the bottom. Drain the liquid (you won't be needing this part but don't waste it, store it in your fridge and use it in smoothies). Transfer the creamy coconut part into a chilled bowl (the chilled bowl helps to keep the coconut cold and thicker while you prepare it). 
Beat the thick coconut cream in the chilled bowl with a hand mixer until thick and fluffy.
Add the vanilla and sweetener, beating into the coconut cream. I use about a full dropper full of stevia, if you're using agave or something else I'd say 1-2 tbsp, add it slowly so you can taste test.   
Now, the fun part, if you want different flavours: add some cinnamon or cocoa powder (you may want to increase the sweetener a bit); or you can also replace the vanilla with almond, coconut, orange, or any extract or liqueur you'd like! Fun, right?!
You can serve immediately, or transfer the coconut cream to a covered storage container and chill for 2 hours until the mixture firms. It will store in the fridge for about a week, but will harden the longer it's in there, so take it out about an hour before serving in this case. 
Enjoy! 

Photobucket

If you found this article to be helpful, please consider a small donation or visit the shop. Thank you for your love and support.

Sunday, September 30, 2012

Ⓥ Vegan Kitchen: Peanut Butter Pumpkin "Cheesecake"! Ⓥ


I found this recipe on Pinterest, from the Damy Health, and had to replicate it and through my own little twist on it. My friend, Tam, who has been my awesome cooking partner lately, made this with me in my new kitchen--it was a fun and delicious evening! :)
I am a sucker for anything peanut butter and chocolate! This recipe also has pumpkin in it which adds some awesome health benefits and gives it a fluffy cheesecake-like texture. This recipe is also no bake, vegan, gluten free, sugar-free, and super easy to prepare! You could easily make this raw as well if you had your own pumpkin. 


Peanut Butter Pumpkin "Cheesecake"
Crust Ingredients:
1 Cup Raw Peanuts
1 Cup Raw Almonds
1 Cup Pitted Dates
4 Tbsp Cocoa
1/4 Cup Water

Peanut Butter Filling Ingredients:
1 Cup Pumpkin Puree
1/2 Cup Peanut Butter
1/3 Cup Pitted Dates, soaked at least 10 mintures--I like to soak them longer so they blend easier
1 Tbsp Stevia

Chocolate Topping Ingredients:
1 Cup Coconut Oil
1 Tbsp Stevia
1/2 Cup Cocoa

Just a note, I am used to stevia, I love the taste! For some it takes a while to get used to the flavour, but my hubby loved this recipe too and he's not overly fond of stevia. You could also half the amount of stevia and add a little sweetener of your choice, but we wanted to keep this sugar-free and uber healthy! ;)


Separately blend each layer listed above in a food processor. The crust should be dough-like, the peanut butter filling should be smooth, and the top should be liquidy.
If you so choose, grease an 8-inch spring form pie plate with a healthy oil. I tend to skip this step--half the time because I forget, the other half because I've never had any issues with my desserts coming out of their dishes. ;)
First, press down the crust into the bottom of the pie plate. Next, layer and smooth out the peanut butter filling. And finish by pouring your chocolate topping over the top. 
Chill for a few hours in the freezer until the top solidifies. 


Remove, cut into pieces and enjoy! 
I think we're going to play around with this recipe a bit as well so that the top isn't quite as hard. It tastes amazing but when you cut into it it kind of smushes everything else since the chocolate top is hard. ;p I'll update this with any changes we make the next time we make this wonderful recipe. ;)
Makes 1 8-inch cake. Try not to devour it all in one go. ;)

And for your entertainment; how silly we are when making this... 


Photobucket

If you found this article to be helpful, please consider a small donation or visit the shop. Thank you for your love and support.

Sunday, September 23, 2012

Ⓥ Vegan Kitchen: Pumpkin PB Bliss Smoothie! Ⓥ


It's that lovely fall time of year when the leaves start to turn and pumpkin is all we can think about. Yum! It's in season, it's healthy, it's versatile, it's fabulous! 
So! A week ago my friend, Tam, and I made the most epic Peanut Butter "Cheesecake" ever! Don't worry, I'll be sharing that recipe soon as well. ;) There was pumpkin in it and it was sublime! But I had leftover pumpkin so I decided to experiment and sort of replicate the filling part of last night's dessert, but into a morning smoothie. I am so in love with this that I opened up a new can of pumpkin puree just so that I could remake it again the next day… and the next day… and yesterday… and today... to say I'm a little obsessed with this might be an understatement. ;) But it tastes like dessert and is healthy goodness to start your day! What's not to love?

This recipe is; vegan (as always), sugar-free, and gluten-free! 

Okay, without further ado, awesome Smoothie time! 


Pumpkin PB Bliss Smoothie

1/2 cup Pumpkin Puree (unsweetened, just pumpkin)
1- 1 1/2 Frozen Bananas
1 Tbsp Peanut Butter
1tsp Stevia
1 cup Coconut Milk Beverage
dash of Cinnamon 

Add all of your ingredients together in a blender or food processor and blend until smooth and creamy! Add less or more "milk" to get your desired consistency. 
I feel that for the texture the bananas being frozen is essential, so make sure you have some handy in the freezer--they're the best way to have in smoothies anyways. ;) You could easily add more pumpkin pie spice as well for more of a, well, pumpkin pie flavour, but I love it the way I make it. ;) 
Makes 1 serving. Enjoy! 


If you're using pumpkin from a can then make sure you store any leftovers in another container as opposed to the can. I get about 3 smoothies per can (I never measure the pumpkin, I just ballpark it ;)). And, just in case you've never frozen banana before, be sure to remove the peal and then store in a ziplock bag or container before putting int he freezer. ;)  


Photobucket

If you found this article to be helpful, please consider a small donation or visit the shop. Thank you for your love and support.

Sunday, August 12, 2012

Ⓥ Apple Peach Berry Crisp Ⓥ


I've made several variations of this wonderful and simple recipe over the past few weeks, with fruit being in season and all it's really quite lovely. We've been picking fresh berries and using locally grown apples and peaches. Yum! 
Not to mention I love desserts that are healthy for you. Guilt-free! 
This recipe is vegan (as always) and can easily be made gluten-free by using gluten-free oats. :)

Apple Peach Berry Crisp

Filling:
2 large Apples, chopped
1 large Peach, chopped
1 cup Berries of your choice (fresh raspberries or huckleberries are my favourite)
1 tbsp Agave
1 tbsp Rice Flour (or flour of your choice)
1 tsp Cinnamon

Crust:
1 cup rolled oats
1/4 cup vegan margarine (or just under a cup of olive oil)
just under 1/4 cup Agave (or sweetener of your choice--I'm going to use stevia next!)
1 tsp Cinnamon


Preheat oven to 350℉. Depending what dish your using (this recipe calls for an 8-inch baking dish) you can oil the bottom--I use a glass baking dish and never oil it and mine come out just peachy ;). Set aside.
In a medium bowl, combine all your filling ingredients. Spoon mixture evenly into your baking dish.
In the same bowl (don't want to waste bowls now), stir your crust ingredients until well mixed. Sprinkle evenly over top of your fruit mixture in the baking dish. Bake for approximately 40 minutes, or until the top is browned and the apples are tender and can easily be poked with a fork. 
Makes approx. 4 servings. 
Top with your favourite vegan ice-cream (if you feel like it) and enjoy! :)


Photobucket

If you found this article to be helpful, please consider a small donation or visit the shop. Thank you for your love and support.
Related Posts Plugin for WordPress, Blogger... Save $100 on Blendtec Factory Recertified Blenders + Free Shipping