Showing posts with label snack. Show all posts

Sunday, November 24, 2013

Ⓥ Apple Pie Smoothie #2 Ⓥ


Apple Pie smoothies are the greatest, aren't they? Well, here's another Apple Pie smoothie for you that is a little different and equally awesome than the last one I posted. 
Enjoy!!  

vegan / gluten free/ sugar-free/ raw

Apple Pie Smoothie

1 Apple, chopped and cored
1 Banana
3 Dates, soaked overnight (to soften them up)
1 Tbsp Walnuts 
1 tsp of Cinnamon
¼ tsp of ground Nutmeg
⅛ tsp of ground Ginger
¼ cup ice
1 cup Water
Stevia to sweeten (or other sweetener of your choice)

Add all the ingredients together in a blender and blend until smooth. Add less or more liquid to get your desired consistency, and less or more sweetener to your desired sweetness. 
Top with a sprinkle of cinnamon. 
Makes 1 serving. Enjoy! 

*I make all my smoothies in our Blendtec Blender--it's an amazing blender and well worth the investment--and it makes the smoothies super super smooth and creamy!* 

Photobucket

If you found this article to be helpful, please consider a small donation or visit the shop. Thank you for your love and support.

Sunday, November 3, 2013

Ⓥ Easy Pan-fried Potatoes Ⓥ


This is a super delicious side dish to a tofu scramble, a veggie burger, or even a starchy meal on its own. ;) Easy, quick, yummy! 

vegan / gluten free/ sugar-free 

Easy Pan-fried Potatoes

2-3 large Potatoes, chopped into cubes 
1/2 tsp Salt
1-2 Garlic cloves, minced (depending how garlicky you want them)
1 tsp Thyme
1 tsp Basil
1/2 tsp the following spices: oregano, cumin, turmeric
1/4 tsp black pepper 
Olive Oil
2 Tbsp Coconut Oil 

In a large frying pan, bring some water to a boil. 
Toss in your cubed potatoes and lit boil for a couple of minutes until the potatoes cook to a nice firmness--do Not overcook them, you don't want them fully cooked at this point, just enough so that you can poke a fork in them. 
Drain the water. 
Add your spices and the garlic and a touch of olive oil, sauté for a couple of minutes. 
Once the potatoes start sticking a bit, add your coconut oil and continue to fry until your potatoes are a lovely golden brown, stirring fairly frequently. 

The coconut oil adds a lovely flavour while also prevents the potatoes from sticking. I always make perfect pan-fried potatoes this method, though you do have to watch the first boiling step because if you overcook them at this step then the potatoes turn out a little more on the mushy side--though still taste amazing. 
Makes 4 small servings, or 3 larger portions. 
Enjoy! 


Photobucket

If you found this article to be helpful, please consider a small donation or visit the shop. Thank you for your love and support.

Sunday, October 6, 2013

Ⓥ Vegan Kitchen: Vegan Nachos Ⓥ


Vegan Nachos for dinner?! Why the hell not? That's what me and hubby thought the other night anyways. It was super delicious, and of course I instagramed it ;p and was asked for the recipe, so I though to myself what a great idea for this week's sunday recipe post. :) 
So, vegan nachos, in all their cheesy dreamy delicious glory. Make them for supper like we did, or make them to snack on or to share with friends. Either way, you win with this yummy platter! 

Vegan Nachos

1/2 pound Tofu (anything from soft to firm works great)
1 Tbsp Tamari (wheat-free)
1/4 tsp each of these spices: Black Pepper, Cumin, ground Mustard
1/2 tsp Turmeric and Chili Powder
1/2 Tbsp Parsley
touch of oil or water*
1 Green Pepper
Sundried Tomatoes
2 Garlic Cloves
Daiya Cheese (or whatever your favourite vegan cheese may be)
Que Pasa Tortilla Chips


*I don't like cooking with oil if I can avoid it, so I use eco-friendly non-stick pans (never use carcinogenic awful teflon!) and a splash of water to prevent sticking--works great, no oil! 

Crumble your tofu and mince your garlic. Toss into a frying pan, and, on medium-high heat, sauté in tamari and spices until the tofu browns and absorbs all that delicious flavour, stirring fairly frequently to avoid sticking. Usually takes about 5-7 minutes.
Dice up your green pepper and add to your tofu mix for a minute or two. 
Preheat oven to 300℉.
Sprinkle a tray (or oven-safe plates*) with as much tortilla chips as you're hungry for. 
(* If you're making this for to snack on, to share, etc. then use an oven tray or something you can use once they're out of the oven. If you're making this for dinner then I prefer to make individual plates--because it's less messy and you just have your serving and can choose how much of everything you want. Just don't touch the hot plates when they come out of the oven (ouch!).)
Top your tortilla chips with your tofu mixture, sprinkle some sun-dried tomatoes on top along with however much daiya cheese you would like. 
Pop in the oven and cook for about 5 minutes until the cheese starts to melt and bubble. 
Serve! And remember to be careful with hot plates! ;o
Makes 2 dinner servings or a lovely sharing plate with friends.   

Photobucket

If you found this article to be helpful, please consider a small donation or visit the shop. Thank you for your love and support.

Sunday, September 29, 2013

Ⓥ Apple Pie Smoothie Ⓥ


It's rainy, it's fall, it's cold, and all I want to do is cuddle up in a blanket fort and enjoy cozy, delicious and healthy snacks, breakfasts, or even desserts! Or… combine all three with this amazing smoothie recipe! ;) 
This recipe makes a great switch-up in your usual smoothie morning recipes (if you're like me and have smoothies every morning for breakfast that is). Even though it's still a cold smoothie, it feels warm and, heck, if you wanted to you could even warm it up and it would be delish! Mmmmmmm!  

Apple Pie Smoothie

3 Tbsp of Gluten-Free Oatmeal (or sub for 2 Tbsp Chia Seeds!)
2 Tbsp of almond butter or sunflower seed butter 
1 apple, chopped
¼ tsp of nutmeg
1 tsp of cinnamon
½ cup ice
1 cup coconut milk (beverage, not canned -- or hemp milk, or almond milk, or any other non-dairy milk)
1 scoop of Vanilla Protein Powder (optional -- if you don't, then add a touch of vanilla extract)
Stevia to sweeten (or other sweetener of your choice)

Cook the oats, or soak them overnight in the fridge--with 1/2 cup water. Wait until they've cooled if cooking them. 
Add all the ingredients together in a blender and blend until smooth. Add less or more liquid to get your desired consistency, and less or more sweetener to your desired sweetness. Top with a sprinkle of cinnamon. 
Makes 1 serving. Enjoy! 

*I make all my smoothies in our Blendtec Blender--it's an amazing blender and well worth the investment--and it makes the smoothies super super smooth and creamy!* 

Photobucket

If you found this article to be helpful, please consider a small donation or visit the shop. Thank you for your love and support.

Sunday, September 15, 2013

Ⓥ Vegan Kitchen: Bliss Ball Protein Bites Ⓥ


So, I was hungry for a snack the other day and had been wanting to make some "bliss balls" for some time. I'd never really looked up a recipe, and decided to just throw together whatever I had on hand. As it turned out, these were amazing and like heaven in my mouth. The texture is a little sticky to eat but totally amazing. 

vegan / gluten free/ sugar-free /raw

Bliss Ball Protein Bites

1/2 cup Walnuts
1/2 cup Dates
2 heaped Tbsp ground Flaxseed
2 Tbsp Hemp Seeds
2 heaped Tbsp Sunflower Seed Butter
1 scoop Chocolate Vega
1 Tbsp Maca
1 Tbsp Agave
2 Tbsp Shredded Coconut


In a blender or food processor*, pulse the walnuts until grounded, but not quite a flour. 
Add the rest of the ingredients, except the dates and coconut, and pulse until well combined. 
Add the dates and pulse until you have a sticky mixture.
Pulse in the coconut shreds so it's just mixed.  
Form into balls. 
Serve immediately or refrigerate a couple hours or overnight to harden them out a bit. 
Double up or triple the recipe to make more! 
Voila!   


*I used my blendtec blender and these took a matter of seconds (literally!) to make. If you have a food processor or regular blender it can take several minutes for the nuts and dates to break down, but totally worth the wait! 

I can't wait to experiment with more flavours and play around with the texture more--and maybe the appearance to make them look prettier. ;) But as they are, they absolutely heavenly! Like little balls of nutella! How amazing is that?! 

Enjoy! 

Photobucket

If you found this article to be helpful, please consider a small donation or visit the shop. Thank you for your love and support.

Sunday, June 9, 2013

Ⓥ Vegan Kitchen: Matcha Watermelon Smoothie Ⓥ


I'd been wanting to try this amazing sounding matcha smoothie recipe over at the LunchBoxBunch.com for a while. It called for watermelon which I never had on hand but now that it's the summer season they're becoming cheaper which is nice. I tried their version the first time around but didn't use a frozen banana and I do believe it makes a world of difference, so make sure your bananas are frozen when you make this recipe. I also altered the original recipe a little bit to my personal liking. And I've included optional ad-ins that I always use in my smoothies but are totally optional--I just love the health kick. ;) 
I must admit this is definitely going to be a summer favourite! I already loved matcha so much and this is probably one of my favourite matcha recipes now. Hope you enjoy as much as I do! 


Matcha Watermelon Smoothie

1 Banana, frozen
1/2 cup Watermelon cubes, frozen
1-2 tsp Matcha
1/2 Tbsp Chia seeds, soaked overnight or for at least 10 minutes
1 cup Hemp Milk (or other non-dairy milk)
touch of Stevia to sweeten (or other sweetener of your choice)

optional ad ins: 
Protein powder 
1 tbsp Hemp seeds
1 Tbsp Flax seeds
Handful of Kale or greens

Toss all the ingredients together in a high-speed blender and blend until smooth. Add less or more liquid to get your desired consistency.   
Makes 1 serving. Enjoy! 


Photobucket

If you found this article to be helpful, please consider a small donation or visit the shop. Thank you for your love and support.

Sunday, June 2, 2013

Ⓥ Vegan Kitchen: Sautéed Mustard Greens! Ⓥ


Mustard greens can be intensely spicy, especially when you're growing them fresh from your own garden. This year we have a healthy happy supply of mustard greens and were trying to figure out how to eat them since they are entirely too zingy for my taste in a salad. That's when this recipe came along. This is super easy to make and super delicious and healthy!  

Sautéed Mustard Greens

2-3 large bunches Mustard Greens, chopped  
1/4 cup Walnuts (or almonds or other nuts) 
1 Garlic Clove, minced
1 Tbsp Nutritional Yeast
1 Tbsp Lemon Juice
1 Tbsp (just under) Tamari or Soy Sauce
dash of Black Pepper
a little water for consistency

In a large frying pan or pot, toss all your ingredients together and sauté on medium heat until lightly cooked. The greens will shrink a lot. 
I like to add chickpeas sometimes as well, really you can add whatever you feel like. :) This recipe is so simple and easy and delicious! Great way to get more greens into your day. 
Makes a wonderful side dish or snack. 
Makes 2-3 servings. 


Photobucket

If you found this article to be helpful, please consider a small donation or visit the shop. Thank you for your love and support.

Sunday, February 24, 2013

Ⓥ Vegan Kitchen: Chickpea Fritters Ⓥ


First thing, these are not falafel, they are lovely crispy chickpea fritters. ;)
I originally found this recipe over at The LunchBox Bunch, with some very slight changes to my liking and to make them gluten free. Check them out anyways, they have a ton of amazing vegan recipes! 
Mine didn't come out as pretty as The LunchBox Bunch, but they still tasted incredibly delicious.
They are pretty easy to make though are a bit messy--but who doesn't have fun getting messy in the kitchen? They are super delicious! 
They'd be great as an appetizer or snack, or a side to a meal like we made them for. I think these would also be awesome in a sandwich or burger, though they are a tad on the crumbly side. 
Of course, these are vegan, and we made them gluten free. 

makes 12 small round fritters.

Pumpkin Chickpea Fritters
1 can Chickpeas, drained 
1/2 cup organic Pumpkin Puree (canned)
1/4 cup Hemp Seeds
1 tsp Garlic powder
2 tsp Apple Cider Vinegar
1/2 tsp Salt
1/4 tsp Black Pepper
a touch of cayenne or chili powder
1 Tbsp Brown Rice Flour (for binding)

1 cup gluten-free panko bread crumbs for coating
Olive Oil for frying. 

*baking note: you could also bake these instead of frying them if you'd prefer. Bake on parchment paper or a lightly greased baking sheet at about 350 degrees for about 20 minutes - or until toasty. BUT the panko bread crumbs are really made for a light fry. 

In a large mixing bowl, add the chickpeas and pumpkin. With a large fork or potato masher, mash the beans until at least 75% of them have been mashed together with the pumpkin.
Add in the spices, apple cider, hemp seeds and flour. Fold together until a moist mixture forms.
Form the mixture into golf ball sized balls and roll in your panko crumbs until well covered - pat down into flatter cakes. 
Preheat a few tablespoons of oil in a large frying pan. Once the oil if hot, place the cakes in the hot oil - carefully!
Try to leave about an inch space between each cake for easier flipping--unlike what I did and mush them all together. ;)  
Cook on each side for a couple of minutes - until toasty brown. Try not to burn, although a bit of crisping is nice.
Let cool a bit, serve, and enjoy! 



Photobucket

If you found this article to be helpful, please consider a small donation or visit the shop. Thank you for your love and support.

Sunday, October 28, 2012

Ⓥ Pumpkin Pie Smoothie Ⓥ


You know how it is, tis the season for lovely pumpkin recipes! And what's not to love? There is so much you can do! 
Here is a super simple but delicious smoothie recipe if you're craving pumpkin pie but don't feel like making an entire pie. ;)

Pumpkin Pie Smoothie

1/2 cup Pumpkin Puree, unsweetened
1/2 Banana
1 cup Almond Milk
1/2 tsp Cinnamon
1/2 tsp Nutmeg
Stevia to sweeten (or other sweetener of your choice)


Toss all the ingredients together in a blender or food processor and blend until smooth. Add less or more liquid to get your desired consistency.  
Top with Coconut Whipped cream and you're in heaven! :) 
Makes 1 serving. Enjoy! 


Photobucket

If you found this article to be helpful, please consider a small donation or visit the shop. Thank you for your love and support.

Sunday, September 2, 2012

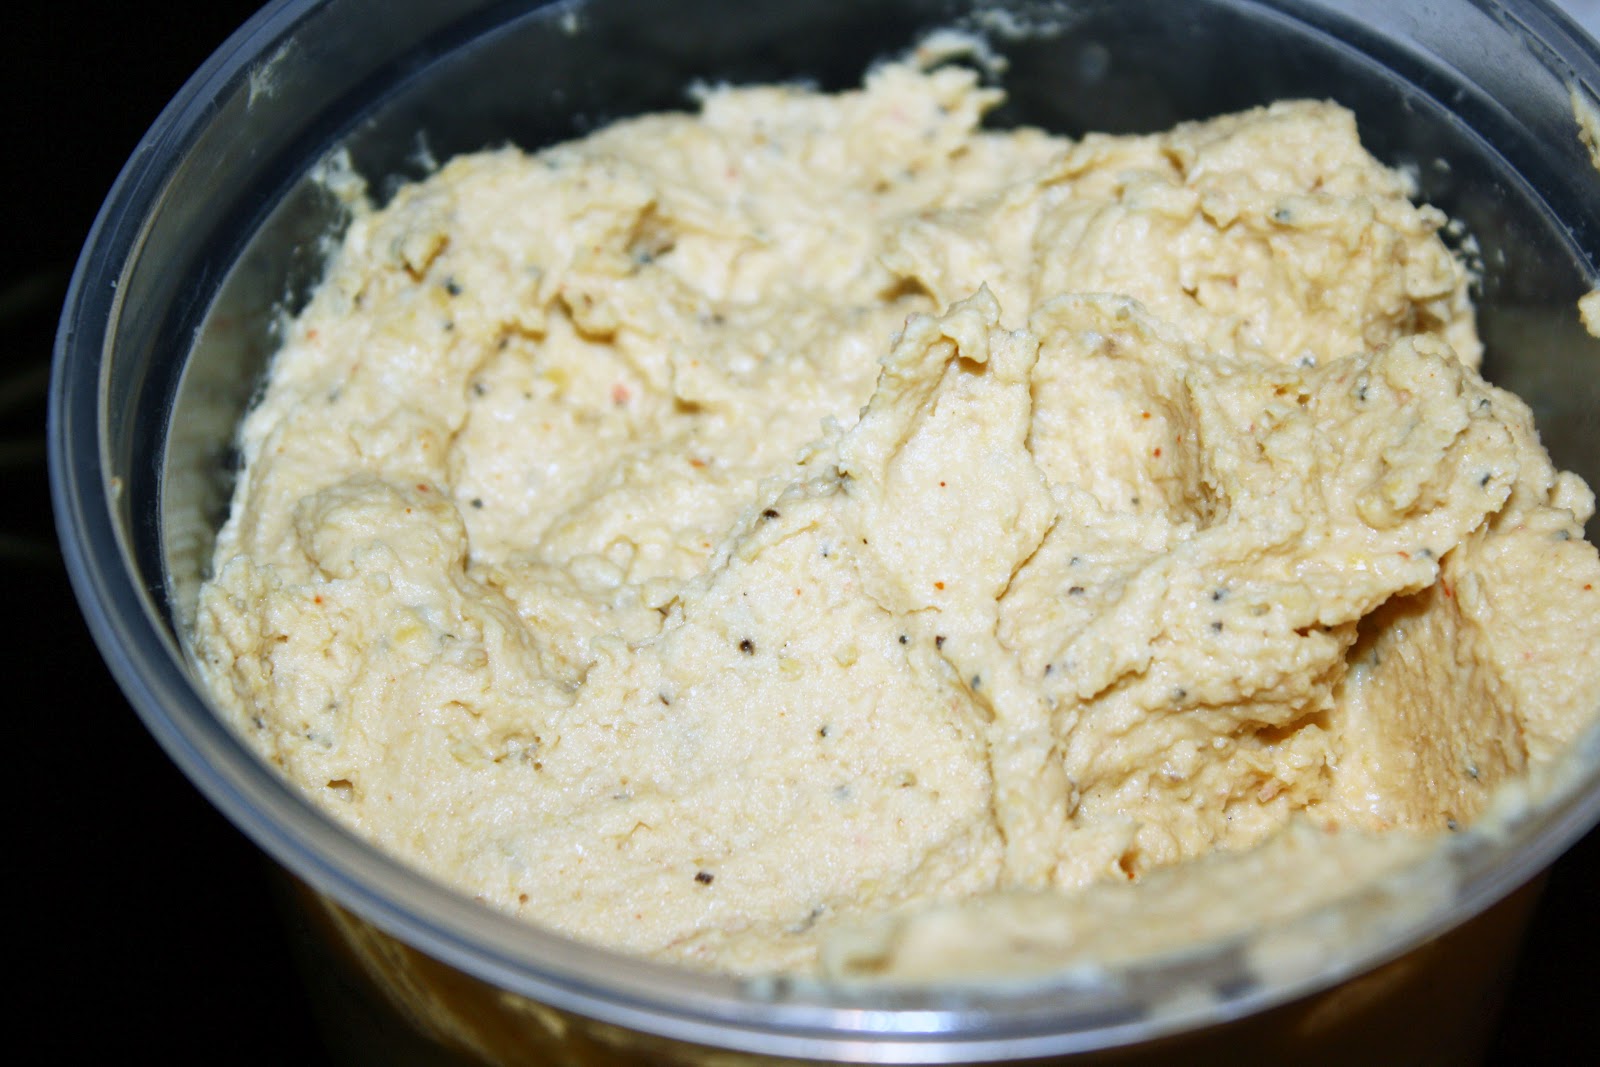
Ⓥ Vegan Kitchen: Hummus! Ⓥ


This recipe is super simple, super easy, and super delicious! Anyone that has ever tried it has loved it and asked me for the recipe (which clearly has taken me far too long to finally post!). Make this for potlucks or snacks, dips, spreads, whatever your heart desires! My favourite is dipping Mary's Crackers in! :)

Hummus
1 can (398ml) Chickpeas, drained and rinsed
2 Tbsp Tahini
2 Tbsp Lemon Juice
2 Tbsp Water
1-2 tsp Garlic Powder (or 1 garlic clove)
1 tsp Salt
1 tsp Black Pepper
1/2 tsp Chili Powder (optional)


In a food processor, combine all your ingredients and process until smooth. You can add more or less water depending on what consistency you'd like. I've also made this recipe before without the lemon juice altogether and it still tastes awesome (though it does taste even more awesome with it). 
Makes a nice sized tub (pictured). ;)
Enjoy!


Photobucket

If you found this article to be helpful, please consider a small donation or visit the shop. Thank you for your love and support.

Sunday, July 22, 2012

Ⓥ Garlic Scape Pesto Ⓥ


Having a garden is all sorts of fun! One reason? Garlic scapes! You can get them at grocery stores too I imagine, I've just never noticed them. Anyway, we found out that we could make pesto out of them so I looked online for recipes and modified, combined, and made my own. 
It's perfect for pastas, quesadillas, pizza, sandwiches, even for dipping, or whatever else your imagination can come up with. 

Garlic Scape Pesto!

(Parmesan Cheese part)
1 cup Sesame Seeds
2 Tbsp Nutritional Yeast
2 Tbsp Lemon Juice
1 Tbsp Water
1/2 tsp Salt
Process all the sesame seeds, nutritional yeast, and salt in a food processor. Add the lemon juice and water once the sesame seeds start to mush together and continue to process until you get a smooth sort of "paste" consistency, or until smooth--this takes a while so be patient. ;)
Set aside in a bowl. 


(complete pesto!)
3 Garlic Scapes
"Parmesan Cheese" (above)
2 Tbsp Lemon Juice
1/4 cup Olive Oil
2 handfuls of Spinach
Process the garlic scapes, spinach, and lemon juice until fine--you don't need to clean out your food processor from making the "parmesan cheese", silly. ;) Add the "cheese" mixture a few portions at a time, alternating with the olive oil. Process until smooth or desired consistency is reached. You may want to add more salt if desired as well. 
Make approximately 1.5-2 cups. 


Again, goes great with so many different recipes so play around with it! Enjoy! :)


Photobucket

If you found this article to be helpful, please consider a small donation or visit the shop. Thank you for your love and support.

Thursday, July 19, 2012

♥ Kur Delights: Raw Healthy Treats! ♥


"Welcome to the Wonderful World of Kur!"

Kur Delights are, well, simply delightful! KUR Organic Superfoods is an awesome company developed in Denmark (but now also produced in the USA) that combines 100% pure and healthy with 100% delicious! There are so many reasons to love KUR, I mean not only are they guilt-free snacks that will satisfy your sweet tooth, but they are conscious to create a product without compromise, a snack that is top quality, clean, healthy, and delicious. KUR Delights are tasty little bite-sized treats that are organic, gluten-free, no-added sugar, and 100% vegan! Food the way nature intended; raw, natural, and delicious! 

Fun info… 
For all you non-Scandinavians out there, the word 'kur' is from the Danish language and it means 'to restore to the natural or proper condition'. It rhymes with 'tour' as in "...dude, Kur is rockin'...they are going on tour". So you see, it's a pretty cool name all around – sensible and exotic!

I love that these snacks are raw, the perfect size, and seriously delightful to eat. There is seriously no compromise on flavour and they are perfect for kids and adults of all ages. The only problem you'll have is not eating them all in one go. ;) 


Benefits of KUR Delights™… 
> USDA Organic certified
> Non-GMO verified
> Gluten-free certified
> Kosher certified
> Vegan certified
> Feingold certified
> Dairy free
> All raw ingredients
> No additives or chemicals
> AND ABSOLUTELY NO ADDED SUGAR OR SWEETENERS! That's right! Not even agave syrup.


They have three tantalizing flavours to choose from: Brownie, Coconut Cream, and Dark Chocolate Mint. 
If you asked me to pick a favourite it would be hard for me to just pick one, they are all equally amazing and absolutely unique. Each flavour is bursting with deliciousness, and each flavour is different from the other. Excitement for your tastebuds to be sure. And, again, what's not to love when you know they are healthy and fuelling your body with pure goodness and positive energy, with ingredients like almonds, cashews, dates, dried fruits, spices, natural oils, nuts and cocoa!


In fact, my only complaint is that I do feel perhaps there is a waste of packaging. They are, however, nicely individually wrapped for super easy and convenient on-the-go purposes, for which the company intended. It keeps the product fresh instead of mushing together and easily accessible when you want them. 

KUR Delights™ truly are an amazing everyday snack and a heavenly healthy sweet option for those (like myself) that constantly crave sweets. ;) 

Check out their website to order yours, or to find a store near you! :)

Lastly, for you entertainment, join KUR's little Birdie mascot in this cute video:

Photobucket

If you found this article to be helpful, please consider a small donation or visit the shop. Thank you for your love and support.

Sunday, June 24, 2012

Ⓥ Vegan Kitchen: Perfect Kale Chips! Ⓥ


These are by far the most amazing things ever created! Not to mention they're healthy! But, seriously, my husband and I cannot get enough of them! We've made made several batches in the past couple weeks--and they never last long because we gobble them up in no time. ;) 
Anyway, these kale chips are perfect and crispy, packed with tantalizing flavour, and… did I mention they're healthy?!! ;) 

We make these in our dehydrator, but I've included general baking instructions to bake these in the oven as well--I just haven't personally made them in the oven, so keep an eye on them and let me know how they turn out. ;)  

Perfect Kale Chips
*2 bunches of Kale, chopped up (larger stems removed)
2 Tbsp Olive Oil
3 Tbsp Nutritional Yeast
1 Tbsp Lemon Juice
1 tsp Salt
1 tsp Garlic Powder
*we don't really measure the kale, we generally buy one or two bunches from the farmer's market or co-op grocery store and chop it up so that it fills a large bowl as pictured. ;) 

Chop up your kale into larger "chip"-sized pieces--don't go too small as they will shrink up a lot--and remove the larger stems. 
Toss your kale into a large mixing bowl with the rest of the ingredients and mix well so that all the kale is coated. 


In the dehydrator:
Line up your kale in your dehydrator trays and dehydrate for approximately 3-4 hours, until the chips are nice and crispy. 
Why I love the dehydrator method? Because you're keeping them (mostly) raw (depending on your ingredients) and therefor packed full of all their beneficial nutrients. :)


In the Oven:
Spread the kale evenly on a large cooking sheet. Now, there are two ways of doing them in the oven…
One, is the attempt to keep more of the nutrients by cooking at a lower temperature: Preheat oven to 200 and bake for 2-3 hours. 
Two, is if you're impatient but you'll kill a large portion of the nutrient value: Preheat oven to 350 and bake for approximately 10 to 15 minutes.
Either way, cook until the kale chips are crispy and the edges are lightly browned--not burnt! 


Enjoy! ;) 


Photobucket

If you found this article to be helpful, please consider a small donation or visit the shop. Thank you for your love and support.

Sunday, June 17, 2012

Ⓥ Vegan Kitchen: Vegan Nutella! Ⓥ


I'm going to have to put a disclaimer at the start of this post… Warning! Upon making this delicious Vegan Nutella you are likely to consume the entire jar in a few days… maybe a few hours… you have been warned! ;) 
Seriously, this stuff is amazing! I haven't had real Nutella since… well, I really can't remember, but I do know that I used to love it and that I love this recipe more. My life will never be the same, because this recipe is amazing. The texture is perfect, nice and creamy and chocolatey and hazelnutty. I've tried making something similar before but it really didn't work out well and got kind of hard in the fridge :p This on the other hand is, well, a dream come true! Plus this is wayyyy healthier than the "real" thing! Score!  
So enough yapping from me, the recipe you've all been waiting for...


Vegan Nutella
1 250g jar of Hazelnut Butter (or 1 cup of home-made Hazelnut Butter--which is about 2 cups of raw Hazelnuts)
(just over) 1/2 cup unsweetened Cocoa Powder
1 tsp Stevia
1/2 tsp Vanilla Extract
1 cup Almond Milk
1/2 cup Agave

In a food processor, combine all the ingredients and process until smooth. You may need to add a little bit more liquid, just make sure you process it long enough and you'll be able to tell how creamy you want it. You can also add a little more agave or sweetener if you want it a little sweeter--but I thought this was quite perfect. ;) And that's it! Simple, easy, delicious! 
If you're using your own homemade hazelnut butter you may want to add a little bit of oil, but I haven't tried it yet so you may be just fine without it. 
Store in the refrigerator for about a week--although you'll probably eat it all before then anyways. ;) It will thicken up very slightly in the fridge but will still stay dreamy creamy smooth! Spread over toast, rice cakes, fruit, or eat it off the spoon! Enjoy!


Photobucket

If you found this article to be helpful, please consider a small donation or visit the shop. Thank you for your love and support.
Related Posts Plugin for WordPress, Blogger... Save $100 on Blendtec Factory Recertified Blenders + Free Shipping