Showing posts with label easy recipe. Show all posts

Sunday, May 25, 2014

Ⓥ Vegan Kitchen: Fancy Mac 'n' Cheese Ⓥ


I like to think of this recipe as an "adult" mac 'n' cheese--meaning let's add a little extra umph, some veggies, and other goodness. ;) 
I have made this sauce with just pasta for my younger brothers before as well and they loved it--and they are picky boys, so I consider this recipe rather kid friendly as well. 

vegan / gluten free/ refined sugar-free/ healthy

Fancy Mac 'n' Cheese 

Enough Pasta for 4 servings--I like to use a brown rice spiral pasta, but anything works.  

For the Sauce:
1/3 cup Rice Flour (or any other flour)
3 Tbsp Coconut Oil
3-4 cups Water
1 heaped tsp Miso 
1 1/2 Tbsp Balsamic Vinegar
2 Tbsp Tamari (or Braggs)
1/2 tsp of Garlic Salt
1 tsp Salt
1/3 tsp Turmeric
1/4 tsp ground Mustard 
dash of Black Pepper
1/4 cup Nutritional Yeast
1/2 cup Daiya shreds

1/3 cup Sunflower Seeds, soaked in water so that they are just covered

1 head of Broccoli, chopped 

Tofu Mix:*
1/2 block firm Tofu, crumbled
2 Tbsp Tamari
1 Tbsp Nutritional Yeast
dash Chili Pepper, Cumin, Black Pepper


Bring a large pot of water to a boil, and cook the pasta according to instructions on package. (depending how long your pasta takes to cook, start cooking accordingly ;)) 

For the Sauce:
While you soak the sunflowers, make the sauce.
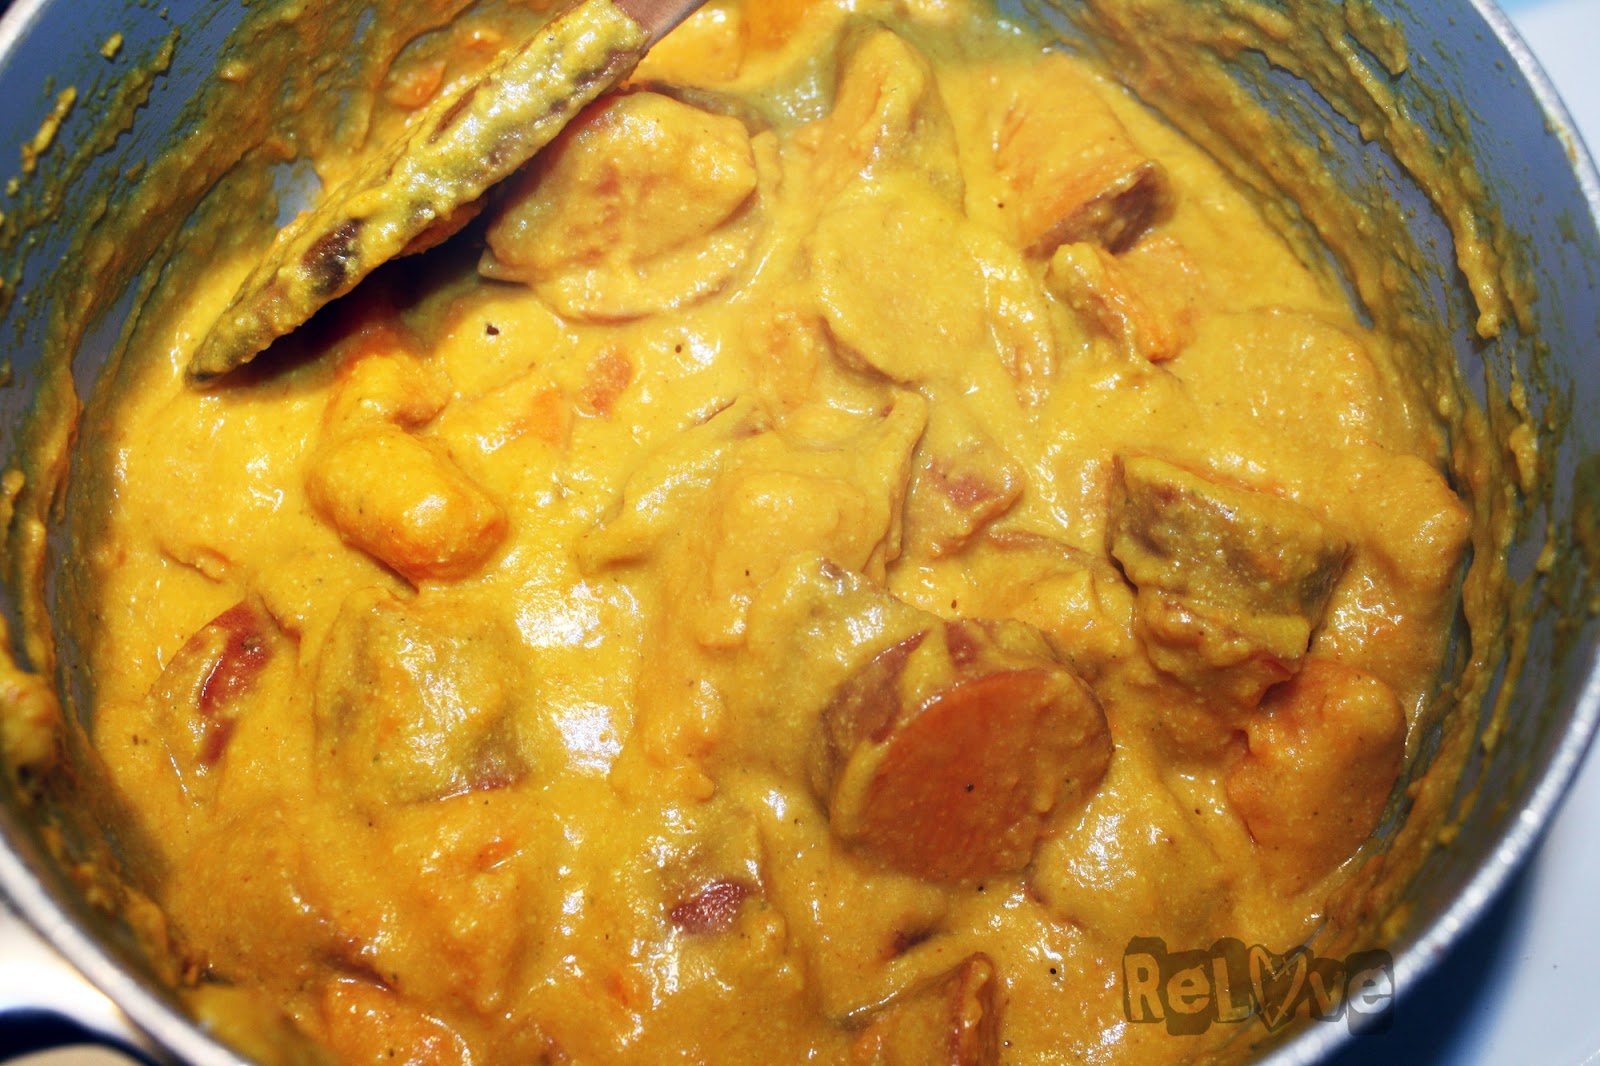
Combine the flour, oil, miso, tamari, and vinegar together in a medium sauce pot and simmer on medium heat, stirring fairly often--until it starts to brown. Once the mixture has browned, slowly start to add water and stir consistently. Add the spices and continue to stir until your sauce is nice consistency. Add the daiya at the end. Let cool. 
In a high-speed blender (I use my blendtec, because they are amazing and use my blendtec for everything), add the sunflower seeds and sauce and blend until perfectly creamy. Add more water if necessary to get your desired consistency. 
Add back into the pot and leave to simmer on low heat. 

While cooking the sauce, if you can manage multi-tasking then make the tofu and broccoli. 
Simply sauté the tofu in tamari and spices, stirring so that it doesn't stick but allow it to brown and really soak up the flavour. 
*You could also just add in veggies dogs or faux meats of some sort, but I love the ease of cooking tofu and the better health factors. 
*I also love making tofu balls instead if you have the time. 
Add the broccoli to the tofu towards the end so it gets nice and tender but not overcooked. 

Add everything together in one large pot--you can probably use the pasta pot if you used a big one. 
Serve! Enjoy! 


Makes 4-5 servings. 
Photobucket

If you found this article to be helpful, please consider a small donation or visit the shop. Thank you for your love and support.

Sunday, November 24, 2013

Ⓥ Vegan Kitchen: Rice Pudding Ⓥ


I love this recipe as a healthy breakfast alternative. Of course, it makes a great dessert as well. ;) 
Super easy and healthy!  

vegan / gluten free/ sugar-free

Rice Pudding

1 1/2 cups cooked Brown Rice*
1 1/4 cups Coconut Milk**
1/4 cup raisins
1/4 cup Agave or maple syrup (or use a little less and use stevia as well)
1 tsp Vanilla
1/2 tsp Cinnamon
1/4 tsp ground Ginger
1/8 tsp ground Nutmeg

*I like to make a batch of Brown Rice for a couple of days for rice bowls and, well, for this recipe. If you don't have rice already made then either make it the night before (since it takes about 50minutes to cook brown rice) or, if you have time, make it in the morning.
**Coconut Milk: use the liquid of a chilled can (I always like to store mine in a cold room or keep one handy in the fridge for recipes), and part of the thick part so that you get enough--store the rest for another recipe for your week :)

In a medium saucepan, add the rice with all of your ingredients. Stir well to combine, and cook the mixture over low heat until warmed and you get a nice consistency that isn't too watery but isn't too dry (add a little water or more coconut milk as necessary). 
Sprinkle with a little cinnamon and serve warm--or chill in the fridge, both are delish! 
Serves 2-3
Enjoy! 


Photobucket

If you found this article to be helpful, please consider a small donation or visit the shop. Thank you for your love and support.

Sunday, October 27, 2013

Ⓥ Vegan Kitchen: Pumpkin Pie Ⓥ


I can't actually believe that I haven't posted a traditional pumpkin pie recipe yet! I made this last week and posted a photo on instagram and immediately had people requesting the recipe. So, here it is! 
For whatever reason, pumpkin pie mixtures have tended to be runny for me in the past (looking online, I've seen lots of others have this same problem), even when following various recipes perfectly. I've found a few tricks that help, as well as the right cooking times-and allowing the pie to set overnight. So hopefully you, too, will enjoy non-runny pumpkin pie. ;)  I've added some helpful hints and ingredients that will help below.

Anyway, what's more amazing than pumpkin pie this time of year? Nothing, that's what! Enjoy this healthy, easy, delicious recipe for yourself and those you love to share with. ;) 

Pumpkin Pie

Pie Crust:
2 cups Almonds, (or pecans or walnuts)
1/2 cup Dates
Dash of sea salt

Blend the crust ingredients together in a food processor or high speed blender. You want it to be blended enough to hold together, but not so blended that you end up with almond butter. ;) Evenly distribute in the bottom of a lightly oiled pie plate, pressing it down evenly.


Pumpkin Pie Filling:

1 16-oz can of Pumpkin Puree (unsweetened)
1/4 cup Tapioca Starch 
1/2 cup Agave (or sweeten to taste with stevia and just add a touch of agave)
1 tsp Cinnamon
1/2 tsp Ginger, ground
1/4 tsp Nutmeg
1 tsp Vanilla
1/4 cup almond milk or water 
1 tbsp Coconut oil (optional, but highly recommended)

Preheat oven to 425.
In a food processor, blender, or even just a large bowl, combine your ingredients until well mixed. 
Pour into your pie crust. 
Bake for 10 minutes at 425°F, and then reduce oven temperature to 350°F; bake until filling is set, about 50 minutes--check it frequently so you don't burn the crust.
Let cool and set overnight in the refrigerator. 
The coconut oil helps to solidify the pumpkin mixture once you take it out of the oven and allow it to set overnight, this is why I highly recommend using it. You don't Need it, it will still taste amazing without it, but it just might be a little less firm. 

Top with Coconut Whipped Cream (super easy recipe here) and enjoy! :) 


Photobucket

If you found this article to be helpful, please consider a small donation or visit the shop. Thank you for your love and support.

Sunday, October 6, 2013

Ⓥ Vegan Kitchen: Vegan Nachos Ⓥ


Vegan Nachos for dinner?! Why the hell not? That's what me and hubby thought the other night anyways. It was super delicious, and of course I instagramed it ;p and was asked for the recipe, so I though to myself what a great idea for this week's sunday recipe post. :) 
So, vegan nachos, in all their cheesy dreamy delicious glory. Make them for supper like we did, or make them to snack on or to share with friends. Either way, you win with this yummy platter! 

Vegan Nachos

1/2 pound Tofu (anything from soft to firm works great)
1 Tbsp Tamari (wheat-free)
1/4 tsp each of these spices: Black Pepper, Cumin, ground Mustard
1/2 tsp Turmeric and Chili Powder
1/2 Tbsp Parsley
touch of oil or water*
1 Green Pepper
Sundried Tomatoes
2 Garlic Cloves
Daiya Cheese (or whatever your favourite vegan cheese may be)
Que Pasa Tortilla Chips


*I don't like cooking with oil if I can avoid it, so I use eco-friendly non-stick pans (never use carcinogenic awful teflon!) and a splash of water to prevent sticking--works great, no oil! 

Crumble your tofu and mince your garlic. Toss into a frying pan, and, on medium-high heat, sauté in tamari and spices until the tofu browns and absorbs all that delicious flavour, stirring fairly frequently to avoid sticking. Usually takes about 5-7 minutes.
Dice up your green pepper and add to your tofu mix for a minute or two. 
Preheat oven to 300℉.
Sprinkle a tray (or oven-safe plates*) with as much tortilla chips as you're hungry for. 
(* If you're making this for to snack on, to share, etc. then use an oven tray or something you can use once they're out of the oven. If you're making this for dinner then I prefer to make individual plates--because it's less messy and you just have your serving and can choose how much of everything you want. Just don't touch the hot plates when they come out of the oven (ouch!).)
Top your tortilla chips with your tofu mixture, sprinkle some sun-dried tomatoes on top along with however much daiya cheese you would like. 
Pop in the oven and cook for about 5 minutes until the cheese starts to melt and bubble. 
Serve! And remember to be careful with hot plates! ;o
Makes 2 dinner servings or a lovely sharing plate with friends.   

Photobucket

If you found this article to be helpful, please consider a small donation or visit the shop. Thank you for your love and support.

Sunday, September 29, 2013

Ⓥ Apple Pie Smoothie Ⓥ


It's rainy, it's fall, it's cold, and all I want to do is cuddle up in a blanket fort and enjoy cozy, delicious and healthy snacks, breakfasts, or even desserts! Or… combine all three with this amazing smoothie recipe! ;) 
This recipe makes a great switch-up in your usual smoothie morning recipes (if you're like me and have smoothies every morning for breakfast that is). Even though it's still a cold smoothie, it feels warm and, heck, if you wanted to you could even warm it up and it would be delish! Mmmmmmm!  

Apple Pie Smoothie

3 Tbsp of Gluten-Free Oatmeal (or sub for 2 Tbsp Chia Seeds!)
2 Tbsp of almond butter or sunflower seed butter 
1 apple, chopped
¼ tsp of nutmeg
1 tsp of cinnamon
½ cup ice
1 cup coconut milk (beverage, not canned -- or hemp milk, or almond milk, or any other non-dairy milk)
1 scoop of Vanilla Protein Powder (optional -- if you don't, then add a touch of vanilla extract)
Stevia to sweeten (or other sweetener of your choice)

Cook the oats, or soak them overnight in the fridge--with 1/2 cup water. Wait until they've cooled if cooking them. 
Add all the ingredients together in a blender and blend until smooth. Add less or more liquid to get your desired consistency, and less or more sweetener to your desired sweetness. Top with a sprinkle of cinnamon. 
Makes 1 serving. Enjoy! 

*I make all my smoothies in our Blendtec Blender--it's an amazing blender and well worth the investment--and it makes the smoothies super super smooth and creamy!* 

Photobucket

If you found this article to be helpful, please consider a small donation or visit the shop. Thank you for your love and support.

Sunday, August 11, 2013

Ⓥ Vegan Kitchen: (Raw) Zucchini Cashew Alfredo Pasta Ⓥ


As I mentioned last week: sooooo many zucchinis (from our garden)!!! One of my favourite things to do with fresh zucchini is to keep it raw and make pasta! Super delicious and because you keep the zucchini raw you're also keeping all of it's amazing nutrients--plus nothing tastes better than zucchinis right from your own garden (or if you don't have a garden, shoot for local as it will too be amazing ;)).
Okay, so here is a super simple, easy, and divine raw dish to keep your summer sizzling and your tummy happy! 


(Raw) Zucchini Cashew Alfredo Pasta

Pasta:
1 large, or a few small Zucchinis, spiralled into long thin "pasta" shapes.*

Sauce:
1 cup Cashews (soaked for 10 minutes or longer)
1 cup Water
1 Tbsp Lemon Juice
1 Garlic Clove
1 Heaped Tbsp Nutritional Yeast
1 tsp Salt
dash of Black Pepper
pinch of oregano (optional)


*Zucchini Pasta Preparation: 
Maybe you are fortunate enough to have an awesome spiralizer, but if you don't (and you don't want to fork up $40 or so for one) then there is a small investment alternative: a Julienne peeler! Ours cost us $12 and it works like a charm. It may take a little more time than a speedy machine, but I like the preparation process anyways, and it really doesn't take very long at all to use one of these amazing peelers. Oh, plus you get awesome thin beautiful "pasta" zucchini! ^_^ 


Sauce:
Place ingredients in a blendtex, vitamix, or even a food processor and blend until smooth. Takes approx. 5 minutes in a food processor. If you own a blendtec or vitamix then you can warm it up slightly too (and it only takes about a minute! Did I mention I love my blentec??! ;)) 
Add a little more water if necessary, or to get your desired consistency. Taste test if needed. 

Serve over your zucchini pasta, top with chopped avocado and you have a delicious heavenly meal that's super good for you!  
Makes approx. 2-4 servings.


Photobucket

If you found this article to be helpful, please consider a small donation or visit the shop. Thank you for your love and support.

Sunday, August 4, 2013

Ⓥ Vegan Kitchen: Stuffed Zucchini Ⓥ


It's Zucchini season and this year our garden is brimming with them for the first time. We actually can't keep up! So, obviously, it's time for some fun zucchini recipes. ;)
This recipe is super easy to make and delicious. It takes a little time but takes very little effort. Perfect! :) 
This makes a perfect summer meal, or a great side dish! 

Stuffed Zucchini

1 large Zucchini (or a few smaller ones)

1 cup Red Lentils
2 cups Water
1 tbsp Miso (veggie stock works too)
2 Garlic cloves, minced
2 Tbsp Nurtitional Yeast
1/2 tsp ground Oregano 
1/2 tsp Black Pepper
1/2 tsp Salt

Daiya cheese (optional/ or other vegan cheese)


Preheat oven to 350° F.
Cut the Zucchini lengthwise. Using a teaspoon, scoop out the centres (seeds and soft centre)--save the scooped out portion. Place the zucchini halves into a large shallow baking dish. 
In a medium saucepan, cook the red lentils in water for about 20 minutes. Chop the scooped out zucchini and add it to the pot along with the miso and spices; cook another 5-10 minutes until the lentils are fully cooked through. 
Spoon the lentil mixture into the hollowed out centres of the zucchini halves. Top with daiya cheese (optional). 
Bake in the oven for 30-45 minutes (cooking time will depend on the size of your zucchini--so check it at about the 30 minute mark by poking it with a fork--it should still be firm but not so firm that it's still hard). 
Serve and enjoy! Makes 4 servings. 


Photobucket

If you found this article to be helpful, please consider a small donation or visit the shop. Thank you for your love and support.

Sunday, July 14, 2013

Ⓥ Vegan Kitchen: Peanut Curry Creamy Pasta Ⓥ


This sauce is so rich, and creamy its heavenly! It's also super easy and quick to make, so double yay! This recipe is not too spicy but with a lovely little kick to it, while the flavour of the dish is subtle yet rich and delightful. 
This recipe came from a spontaneous whim of adding a little this and that while I wanted to make something I hadn't made before. I am super happy with the results and I think this will be another new favourite to my repertoire. 
As always: vegan, gluten-free, free of refined sugars and crap your body doesn't need. ;) 

Peanut Curry Creamy Pasta

1 cup tofu, crumbled
2 tbsp tamari
1 tbsp apple cider vinegar
1 tbsp lemon juice
1 Zucchini, chopped
Kale, Swiss Chard (or other greens of your choice)
1 can coconut milk (I use full fat by thai kitchen)
2 tbsp rice flour (or other flour)
1/4 cup pb
1 tsp red curry paste
1/4 tsp cumin
1/2 tsp ginger
1/2 tsp chili powder
1 tsp salt
1 tsp garlic powder
Water 

2 cups gluten-free pasta (or whatever pasta you'd prefer)

In a large saucepan, crumble your tofu, add the tamari, vinegar, lemon juice and curry paste and sauté for a few minutes so the tofu soaks up the flavour. 
While the tofu is sautéing, chop up your vegetables. Add the vegetables to the pot and sauté another couple minutes, stirring occasionally and adding a little water so nothing sticks to the pot. 
Add your coconut milk and simmer on medium heat for a few minutes. 
Add the spices, salt, and flour, and stir occasionally. 
Your sauce will start to thicken so add a little more water as needed to get your desired consistency of the sauce. 
Add the peanut butter, stirring, and once again adding more water if necessary. Simmer on low-medium heat until cooked. 
Boil your pasta at whichever point depending on how long it takes to boil (this will depend on what kind of pasta you use). Entire cooking and prep time for this recipe takes approx. 30 minutes. 
Add your cooked pasta into the sauce or serve as is so people can choose how much pasta and sauce they'd like. ;) 
Enjoy!! Makes approx. 4 large servings.    


Photobucket

If you found this article to be helpful, please consider a small donation or visit the shop. Thank you for your love and support.

Sunday, June 2, 2013

Ⓥ Vegan Kitchen: Sautéed Mustard Greens! Ⓥ


Mustard greens can be intensely spicy, especially when you're growing them fresh from your own garden. This year we have a healthy happy supply of mustard greens and were trying to figure out how to eat them since they are entirely too zingy for my taste in a salad. That's when this recipe came along. This is super easy to make and super delicious and healthy!  

Sautéed Mustard Greens

2-3 large bunches Mustard Greens, chopped  
1/4 cup Walnuts (or almonds or other nuts) 
1 Garlic Clove, minced
1 Tbsp Nutritional Yeast
1 Tbsp Lemon Juice
1 Tbsp (just under) Tamari or Soy Sauce
dash of Black Pepper
a little water for consistency

In a large frying pan or pot, toss all your ingredients together and sauté on medium heat until lightly cooked. The greens will shrink a lot. 
I like to add chickpeas sometimes as well, really you can add whatever you feel like. :) This recipe is so simple and easy and delicious! Great way to get more greens into your day. 
Makes a wonderful side dish or snack. 
Makes 2-3 servings. 


Photobucket

If you found this article to be helpful, please consider a small donation or visit the shop. Thank you for your love and support.

Sunday, April 7, 2013

Ⓥ Vegan Kitchen: Sunflower Pâté Spread Ⓥ


This recipe is super simple, easy to make, super delicious, and quite versatile. It is also a healthy and tasty alternative to cream cheese or unhealthy spreads. It's also mostly raw! Double the healthiness!  
Use it as a dip, a sandwich spread, in wraps or nori rolls, in stuffed peppers, or whatever your heart desires! I've used this in grilled cheese sandwiches before with a bit of daiya, which admittedly lowers the healthy part but is still a great alternative to anything else and satisfies that comfort food craving at the same time.    

Sunflower Pâté Spread

1 1/2 c raw Sunflower Seeds, soaked overnight and rinsed (and sprouted if desired)
1/2 c fresh Lemon Juice
2 tbsp Tamari 
2 small Garlic cloves, minced
1/2 tsp sea salt
3 tbsp Nutritional Yeast

Once your sunflowers seeds have been soaked and rinsed, throw all your ingredients into a food processor and blend until fairly smooth. Be sure to scrape down the sides every so often so you don't miss any seeds or garlic.

Keeps for about 2 weeks in the fridge.

Enjoy! 


Photobucket

If you found this article to be helpful, please consider a small donation or visit the shop. Thank you for your love and support.

Sunday, March 31, 2013

Ⓥ Vegan Kitchen: 3-Ingredient Soft Serve Ice Cream Ⓥ


This recipe is super duper simple and super duper delicious. You can play around with it too to get different flavours (I'll include some favourites below). 
It is important that the bananas are frozen--unless you add more ice, but I prefer the texture you get from frozen bananas, it's like soft serve ice cream! Yum! 
Vegan, gluten and common allergen-free!  

3-Ingredient Ice Cream

2 Frozen Bananas
2 Tbsp Peanut Butter
touch of sweetener

Throw the frozen bananas into your food processor (you can use some blenders but it might not work the same — you could also use certain juicers. I make this in my Blendtec and it works great too but I usually have to add a little liquid). Then turn the processor on and let it run for about five minutes, stopping every now and then to scrape it down. The bananas should get increasingly light, fluffy, and smooth. Towards the end, add the peanut butter and sweetener if desired and continue to process. By the time you’re done, it’ll resemble a creamy bowl of soft serve! 
Eat immediately (or it will loose its texture). 
Voila! Soft serve ice cream!!! 
Makes 2 delicious servings. 


Now, for some extras for different Flavours…

Add 1 Tbsp Vanilla extract for, well vanilla. 
Add 1-2 Tbsp Cocoa for a chocolatey flavour. 
Add a scoop of Choc-a-lot Vega for a protein and chocolatey boost! 
Sub Peanut Butter for Almond Butter or Hazelnut Butter for different flavours. (you can also make this without any nut butter altogether for simple soft serve)

After you've made the ice cream, add a peanut butter larabar and pulse to get yummy chewy chunks. 
You can also pulse in any other handy desserts, like cheesecake, brownie pieces, oreo-type cookies, and so forth! Yum!
You'll never miss blizzards again! ;)  


Photobucket

If you found this article to be helpful, please consider a small donation or visit the shop. Thank you for your love and support.

Ⓥ Vegan Kitchen: Chocolate Mousse #2 Ⓥ


I love avocado pudding. It's amazing. It's bliss. Oh, and it's healthy! *gasp*
This is my second avocado pudding, this one is a little thicker with an almost cheesecake-like texture to it. It's simply divine! 
As always, vegan and gluten-free! Also sugar free and free of most common allergens. 

Avocado Pudding

6 pitted Dates (soaked at least 10 minutes)
1 Avocado
1/4 cup Cocoa or Cacao powder
1 Tbsp Vanilla
1/2 tsp Cinnamon
1/2 tsp Salt
2 tsp Stevia (I use Now brand)
2 heaped Tbsp Coconut Oil
1/2 cup water (soak the dates in it and use the water)


Pit your avocado and scoop out the "meat" (if this wasn't obvious ;p) 
Place all the ingredients in a Food Processor or Blender and blend until smooth.
Add more water or vegan milk to get desired consistency. You want it to be thick and creamy. Place in fridge for an hour or so where it will solidify a bit to give it a lovely texture. 
Makes 2 large or 4 small servings. Enjoy!


Photobucket

If you found this article to be helpful, please consider a small donation or visit the shop. Thank you for your love and support.

Sunday, March 24, 2013

Ⓥ Vegan Kitchen: Easy "Cheesy" Potatoes! Ⓥ


This is a delicious, creamy, easy and quick recipe to whip up. It's the perfect comfort food and/or side dish to any meal and will leave any cheesy cravings satisfied. 
This recipe is gluten free, dairy free (and vegan of course), free of nuts, and free of soy--for those with lots of allergies like myself. ;)  

Easy "Cheesy" Potatoes

1 Large Sweet Potato (or regular potatoes)
1 Tbsp Earth Balance, or vegan margarine
1 Tbsp Rice flour (or other flour)
1/4 cup vegetable broth
4 Tbsp Nutritional Yeast
1 Tbsp Lemon Juice
3/4 tsp Salt
1 tsp Mustard, ground
1/2 tsp Garlic salt
1/2 tsp Turmeric 
about 1/2 cup "Milk" (I like to use coconut because it's a little creamier)


Chop up your potatoes and in a medium pot, boil them until almost cooked. Don't overcook them though, you want to be able to be firm but able to poke them with a fork but for them not to be mushy.  
Drain the water. 
In the same pot, add the earth balance, stock, and spices and stir for a moment. Add the flour, nutritional yeast, and lemon juice, and then gradually add the milk, stirring constantly. The flour will thicken up the sauce so you can add more or less milk depending on how creamy you want it to be. Cook for a few minutes until your sauce has thickened up. 
Serve and enjoy! Super easy cheesy potatoes! 
Makes 2 servings. If you want larger portions just double up the recipe. 


This recipe has been shared at: Fat Tuesday
Photobucket


If you found this article to be helpful, please consider a small donation or visit the shop. Thank you for your love and support.

Sunday, March 10, 2013

Ⓥ Nutty Granola Ⓥ


I've been meaning to make granola forever now. I love granola, it's just so good and delicious and crunchy and wholesome. But… I can't eat cane sugar, which pretty much cuts out all possible buying options for granola cereals. So, I figured it was about time I made some! It's really easy and doesn't take that much time, which is why I have no good reason for not doing this sooner. This granola is super delicious, with a lovely coconutty-nutty flavour. Plus it's healthy and packed full of nutrition and gives you breakfast for the whole week--or longer.
Anyway, enough from me, let's make some granola! 
This recipe is vegan (as always) and can easily be made gluten-free by using gluten-free oats. :)

Nutty Granola
Dry:
3 cups rolled oats
1/2 cup almonds or peanuts, roughly chopped
1/2 cup walnuts, roughly chopped
1/4 cup raw sunflower seeds
1/4 cup raw pumpkin seeds
2 tbsp flax seeds
1/4 cup unsweetened shredded coconut
1/3 cup raisins
1/4 cup cacao nibs (or vegan chocolate chips)
1 tsp ground cinnamon
Pinch of ground nutmeg
3/4 tsp kosher salt

Wet: 
1/4 cup of agave nectar (or use a tbsp of stevia with a touch of agave like I do)
2 tbsp coconut oil
1/4 cup peanut butter
1/4 cup of hot water

Preheat oven to 300℉
In a medium saucepan over medium heat, add the wet ingredients. Stir well. Bring to a boil and then simmer on low for 5-10 minutes, stirring frequently.
In a very large mixing bowl, mix together the dry ingredients.
Add the wet mixture (while still warm) over top the dry mixture and stir well. Stir until thoroughly combined (don't miss any!).
Spread onto a pan lined with aluminium foil (greatly helpful in preventing sticking) and bake in the oven for 20-30 minutes. Make sure you give the granola a good stir every 7-10 minutes to ensure even baking. Keep an eye on it as well as the oats can catch quickly if you don't. 
Allow to cool for 30 minutes on the pan before serving. The granola will stiffen up as it cools.
Makes about 6 cups and will keep for 1 month in the fridge in an air-tight container.
Enjoy with some lovely almond milk for an extra nutty flavour!


Photobucket

If you found this article to be helpful, please consider a small donation or visit the shop. Thank you for your love and support.

Sunday, August 12, 2012

Ⓥ Apple Peach Berry Crisp Ⓥ


I've made several variations of this wonderful and simple recipe over the past few weeks, with fruit being in season and all it's really quite lovely. We've been picking fresh berries and using locally grown apples and peaches. Yum! 
Not to mention I love desserts that are healthy for you. Guilt-free! 
This recipe is vegan (as always) and can easily be made gluten-free by using gluten-free oats. :)

Apple Peach Berry Crisp

Filling:
2 large Apples, chopped
1 large Peach, chopped
1 cup Berries of your choice (fresh raspberries or huckleberries are my favourite)
1 tbsp Agave
1 tbsp Rice Flour (or flour of your choice)
1 tsp Cinnamon

Crust:
1 cup rolled oats
1/4 cup vegan margarine (or just under a cup of olive oil)
just under 1/4 cup Agave (or sweetener of your choice--I'm going to use stevia next!)
1 tsp Cinnamon


Preheat oven to 350℉. Depending what dish your using (this recipe calls for an 8-inch baking dish) you can oil the bottom--I use a glass baking dish and never oil it and mine come out just peachy ;). Set aside.
In a medium bowl, combine all your filling ingredients. Spoon mixture evenly into your baking dish.
In the same bowl (don't want to waste bowls now), stir your crust ingredients until well mixed. Sprinkle evenly over top of your fruit mixture in the baking dish. Bake for approximately 40 minutes, or until the top is browned and the apples are tender and can easily be poked with a fork. 
Makes approx. 4 servings. 
Top with your favourite vegan ice-cream (if you feel like it) and enjoy! :)


Photobucket

If you found this article to be helpful, please consider a small donation or visit the shop. Thank you for your love and support.

Sunday, August 5, 2012

Ⓥ Barbecued Marinated Tofu Ⓥ


I don't know how I've been vegan for so long and never tried making my own tofu for the barbecue. Well, I decided to change that and play around with recipes and both me and my hubby loved this barbecued delight!

Barbecued Marinated Tofu
1 pound Extra Firm Tofu
4 Tbsp Tamari or Soy Sauce
1-2 minced Garlic
1 Tbsp Ginger, ground
2 Tbsp Rice Vinegar
2 tsp Agave
1 Tbsp Oil
Tofu Tips: Use Firm or Extra Firm Tofu so that it holds together. If you want you can also freeze your tofu and unthaw it for a "meatier" texture. 


Slice up your tofu into strips or triangles, the thickness is more or less dependant on your personal preference, the thicker the better they'll hold but the thinner the faster they'll cook. I usually cut mine about 1cm thick. 
Press out as much of the water as you can--most people like to use a kitchen towel or paper towel and really press it out, but I honestly don't bother with that part and my tofu always turns out just fine. ;) 
Prepare the marinade! In a small bowl, combine the rest of the ingredients until well mixed. Place your tofu slices into the marinade--use a shallow dish or ziplock bag, or something that your tofu can really soak up the marinade. The longer the tofu remains in the marinade, the more flavour it will soak up, half an hour is generally the minimum--but I only soaked them for ten minutes one time and they still turned out great… but I also soaked them over two nights and they were much more flavourful. I think overnight is ideal. ;)  
Make sure your barbecue is lightly oiled as tofu tends to stick. Place your slices on the grill and, well, grill until tofu starts to crisp, flipping over to evenly cook each side. 
Serve with your favourite sides! And voila! 


You can also make this in the oven by placing the tofu in a shallow dish and baking at 350℉ for approximately 35-45 minutes, flipping tofu at least once, until brown and slightly crispy. 

Makes 2-4 servings. Enjoy! 


Photobucket

If you found this article to be helpful, please consider a small donation or visit the shop. Thank you for your love and support.

Sunday, July 22, 2012

Ⓥ Garlic Scape Pesto Ⓥ


Having a garden is all sorts of fun! One reason? Garlic scapes! You can get them at grocery stores too I imagine, I've just never noticed them. Anyway, we found out that we could make pesto out of them so I looked online for recipes and modified, combined, and made my own. 
It's perfect for pastas, quesadillas, pizza, sandwiches, even for dipping, or whatever else your imagination can come up with. 

Garlic Scape Pesto!

(Parmesan Cheese part)
1 cup Sesame Seeds
2 Tbsp Nutritional Yeast
2 Tbsp Lemon Juice
1 Tbsp Water
1/2 tsp Salt
Process all the sesame seeds, nutritional yeast, and salt in a food processor. Add the lemon juice and water once the sesame seeds start to mush together and continue to process until you get a smooth sort of "paste" consistency, or until smooth--this takes a while so be patient. ;)
Set aside in a bowl. 


(complete pesto!)
3 Garlic Scapes
"Parmesan Cheese" (above)
2 Tbsp Lemon Juice
1/4 cup Olive Oil
2 handfuls of Spinach
Process the garlic scapes, spinach, and lemon juice until fine--you don't need to clean out your food processor from making the "parmesan cheese", silly. ;) Add the "cheese" mixture a few portions at a time, alternating with the olive oil. Process until smooth or desired consistency is reached. You may want to add more salt if desired as well. 
Make approximately 1.5-2 cups. 


Again, goes great with so many different recipes so play around with it! Enjoy! :)


Photobucket

If you found this article to be helpful, please consider a small donation or visit the shop. Thank you for your love and support.
Related Posts Plugin for WordPress, Blogger... Save $100 on Blendtec Factory Recertified Blenders + Free Shipping